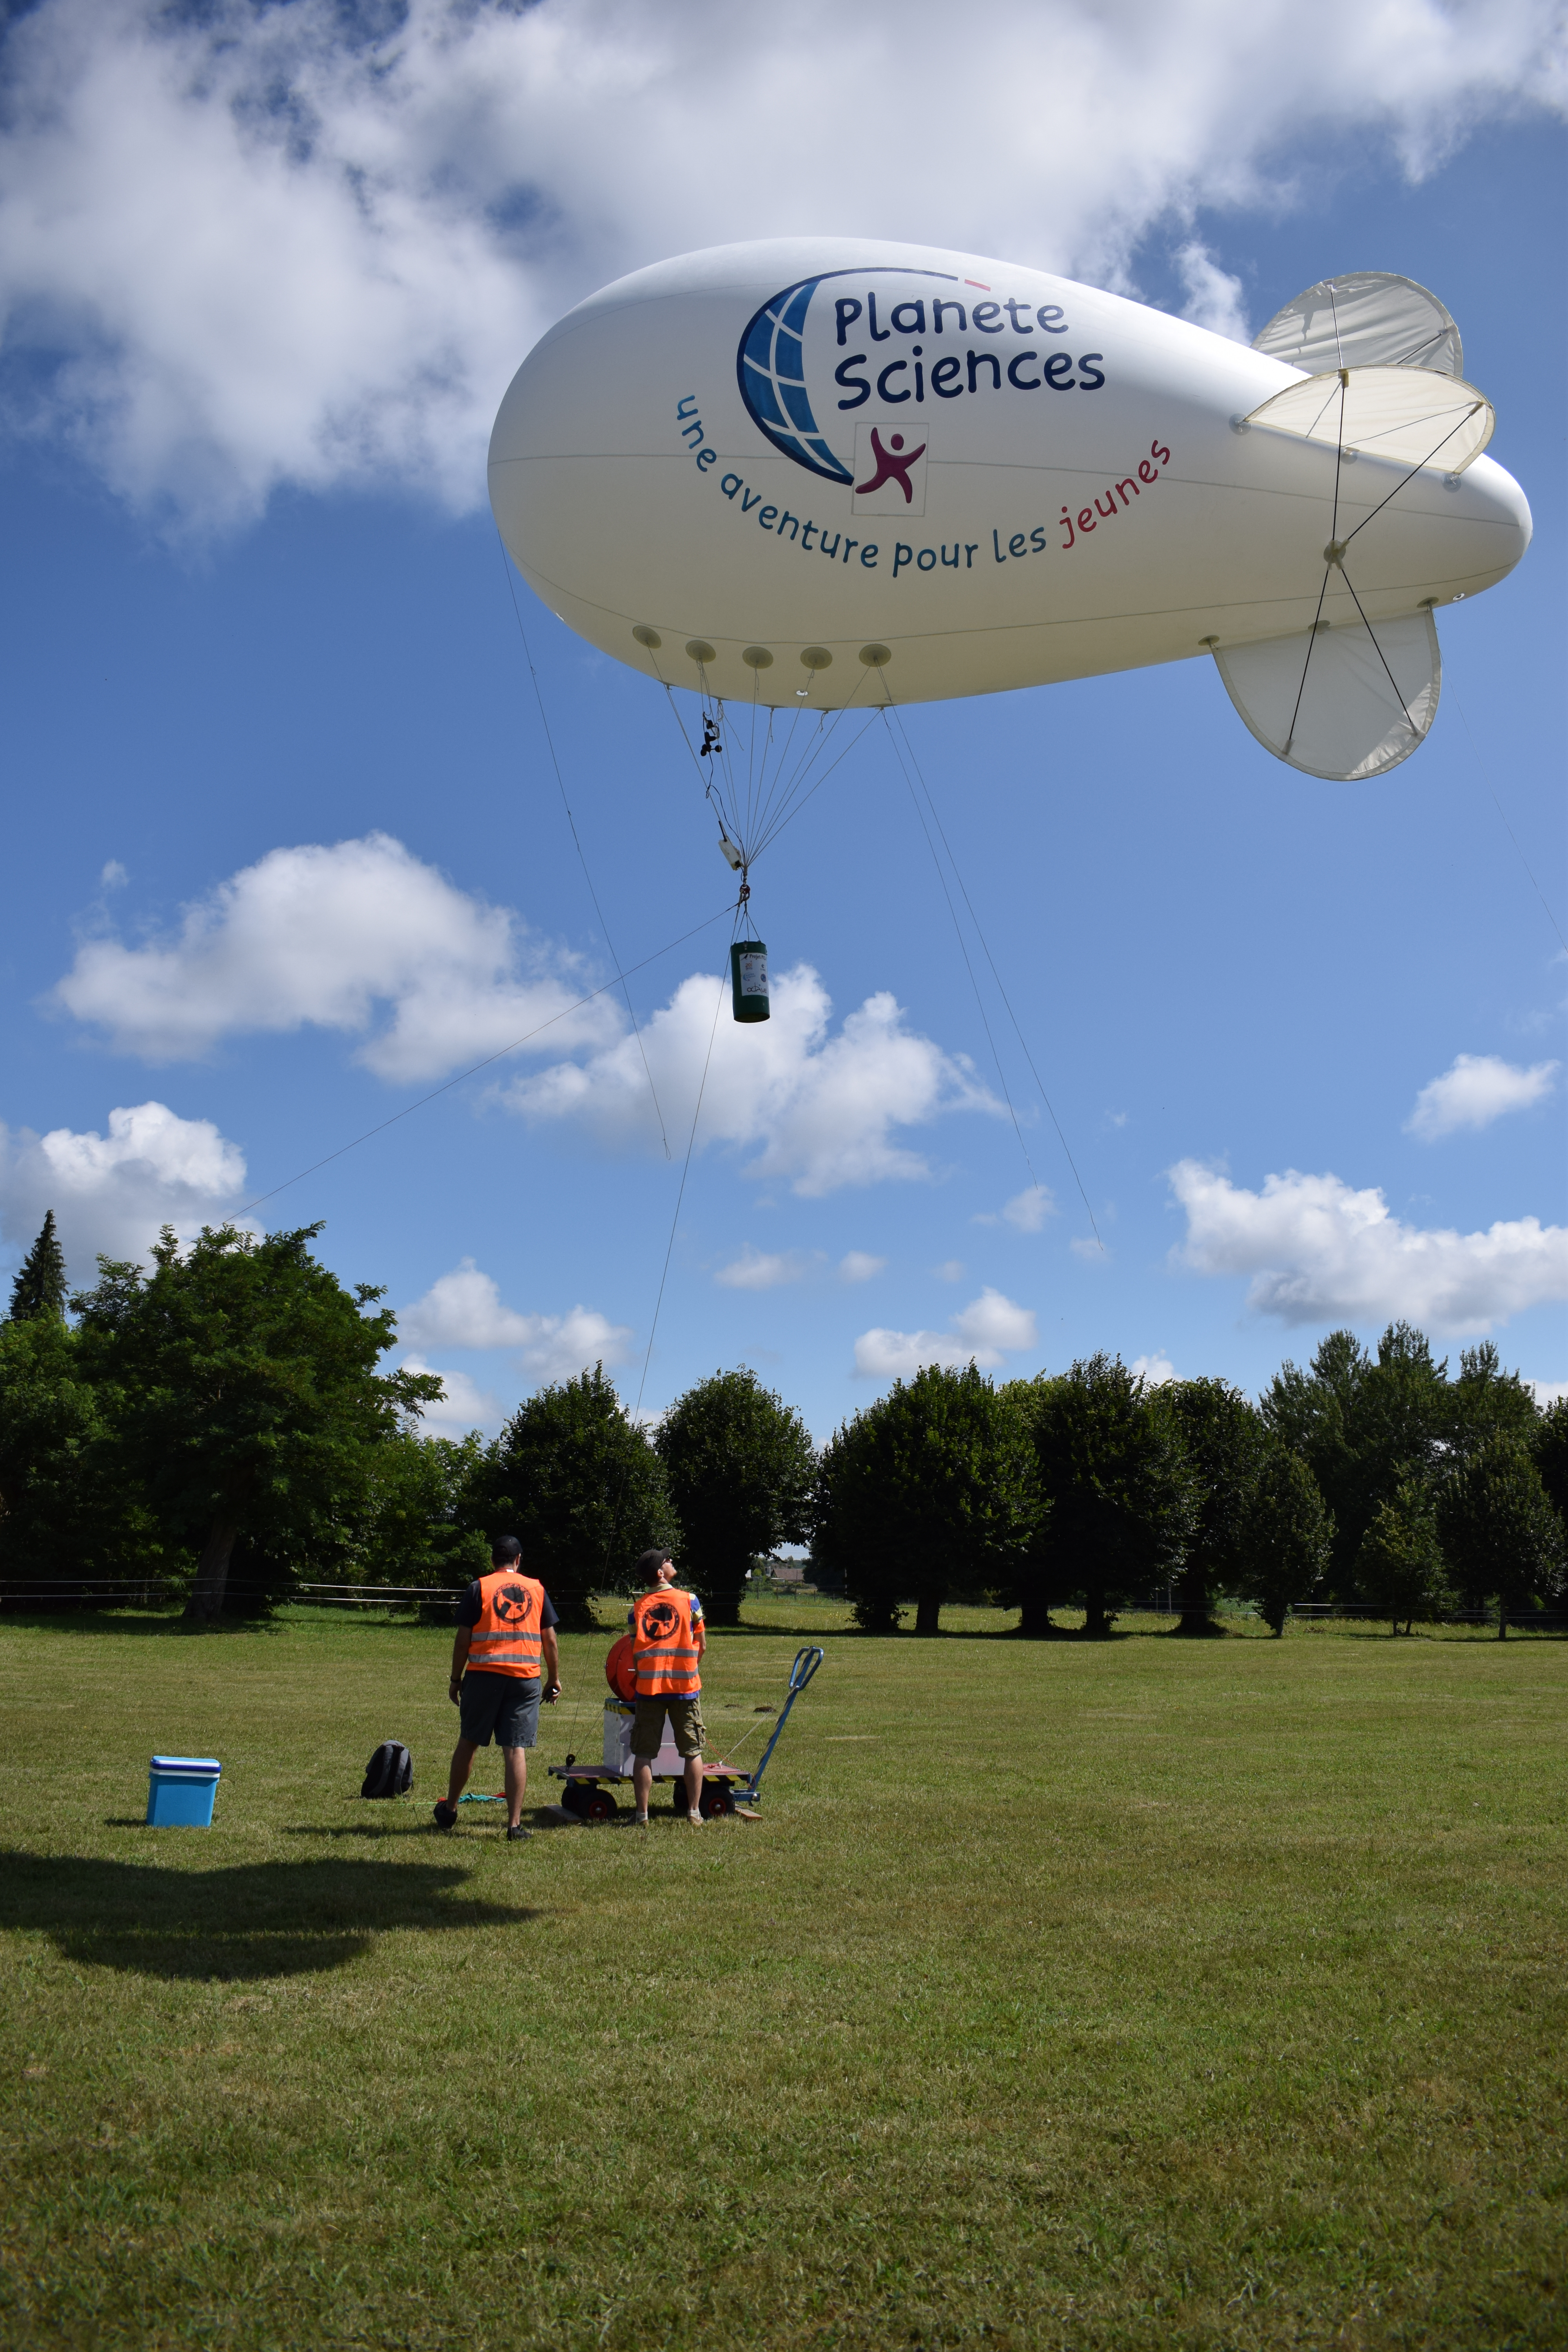
CanSats, like their name implies, are small satellites designed to fit into the volume of a 33cL can of soda. They are launched from a balloon from an altitude of about 150m and must perform some missions while descending under their parachute. The French CanSat competition takes place every year during the C’Space, the event during which we also launch experimental rockets.

The launchers, which are attached under the balloon and provide a remote-controlled hatch to drop the CanSats, were getting old and needed replacement. I figured the LoRa transmitters I used for my Silver project would work great for this application so I offered to design a new model of launchers. As always, what started as a simple project turned out taking way longer than anticipated but the three prototypes were ready on time and have been successfully tested during the campaign.
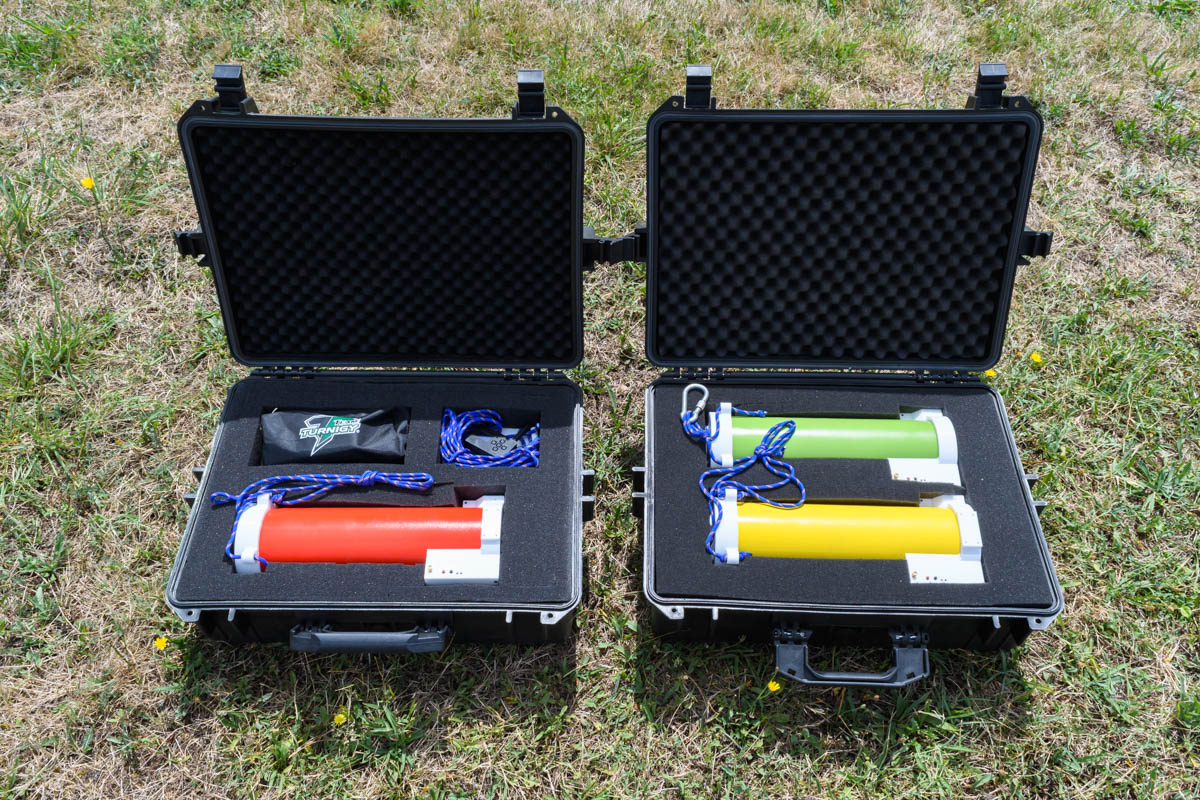
The development was divided into three main parts : the mechanical assembly, the main PCB, and the remote control. Three launchers were needed in total : two to be used alternatively (one is under the balloon while the other is being prepared) and one spare as backup.
Mechanical assembly
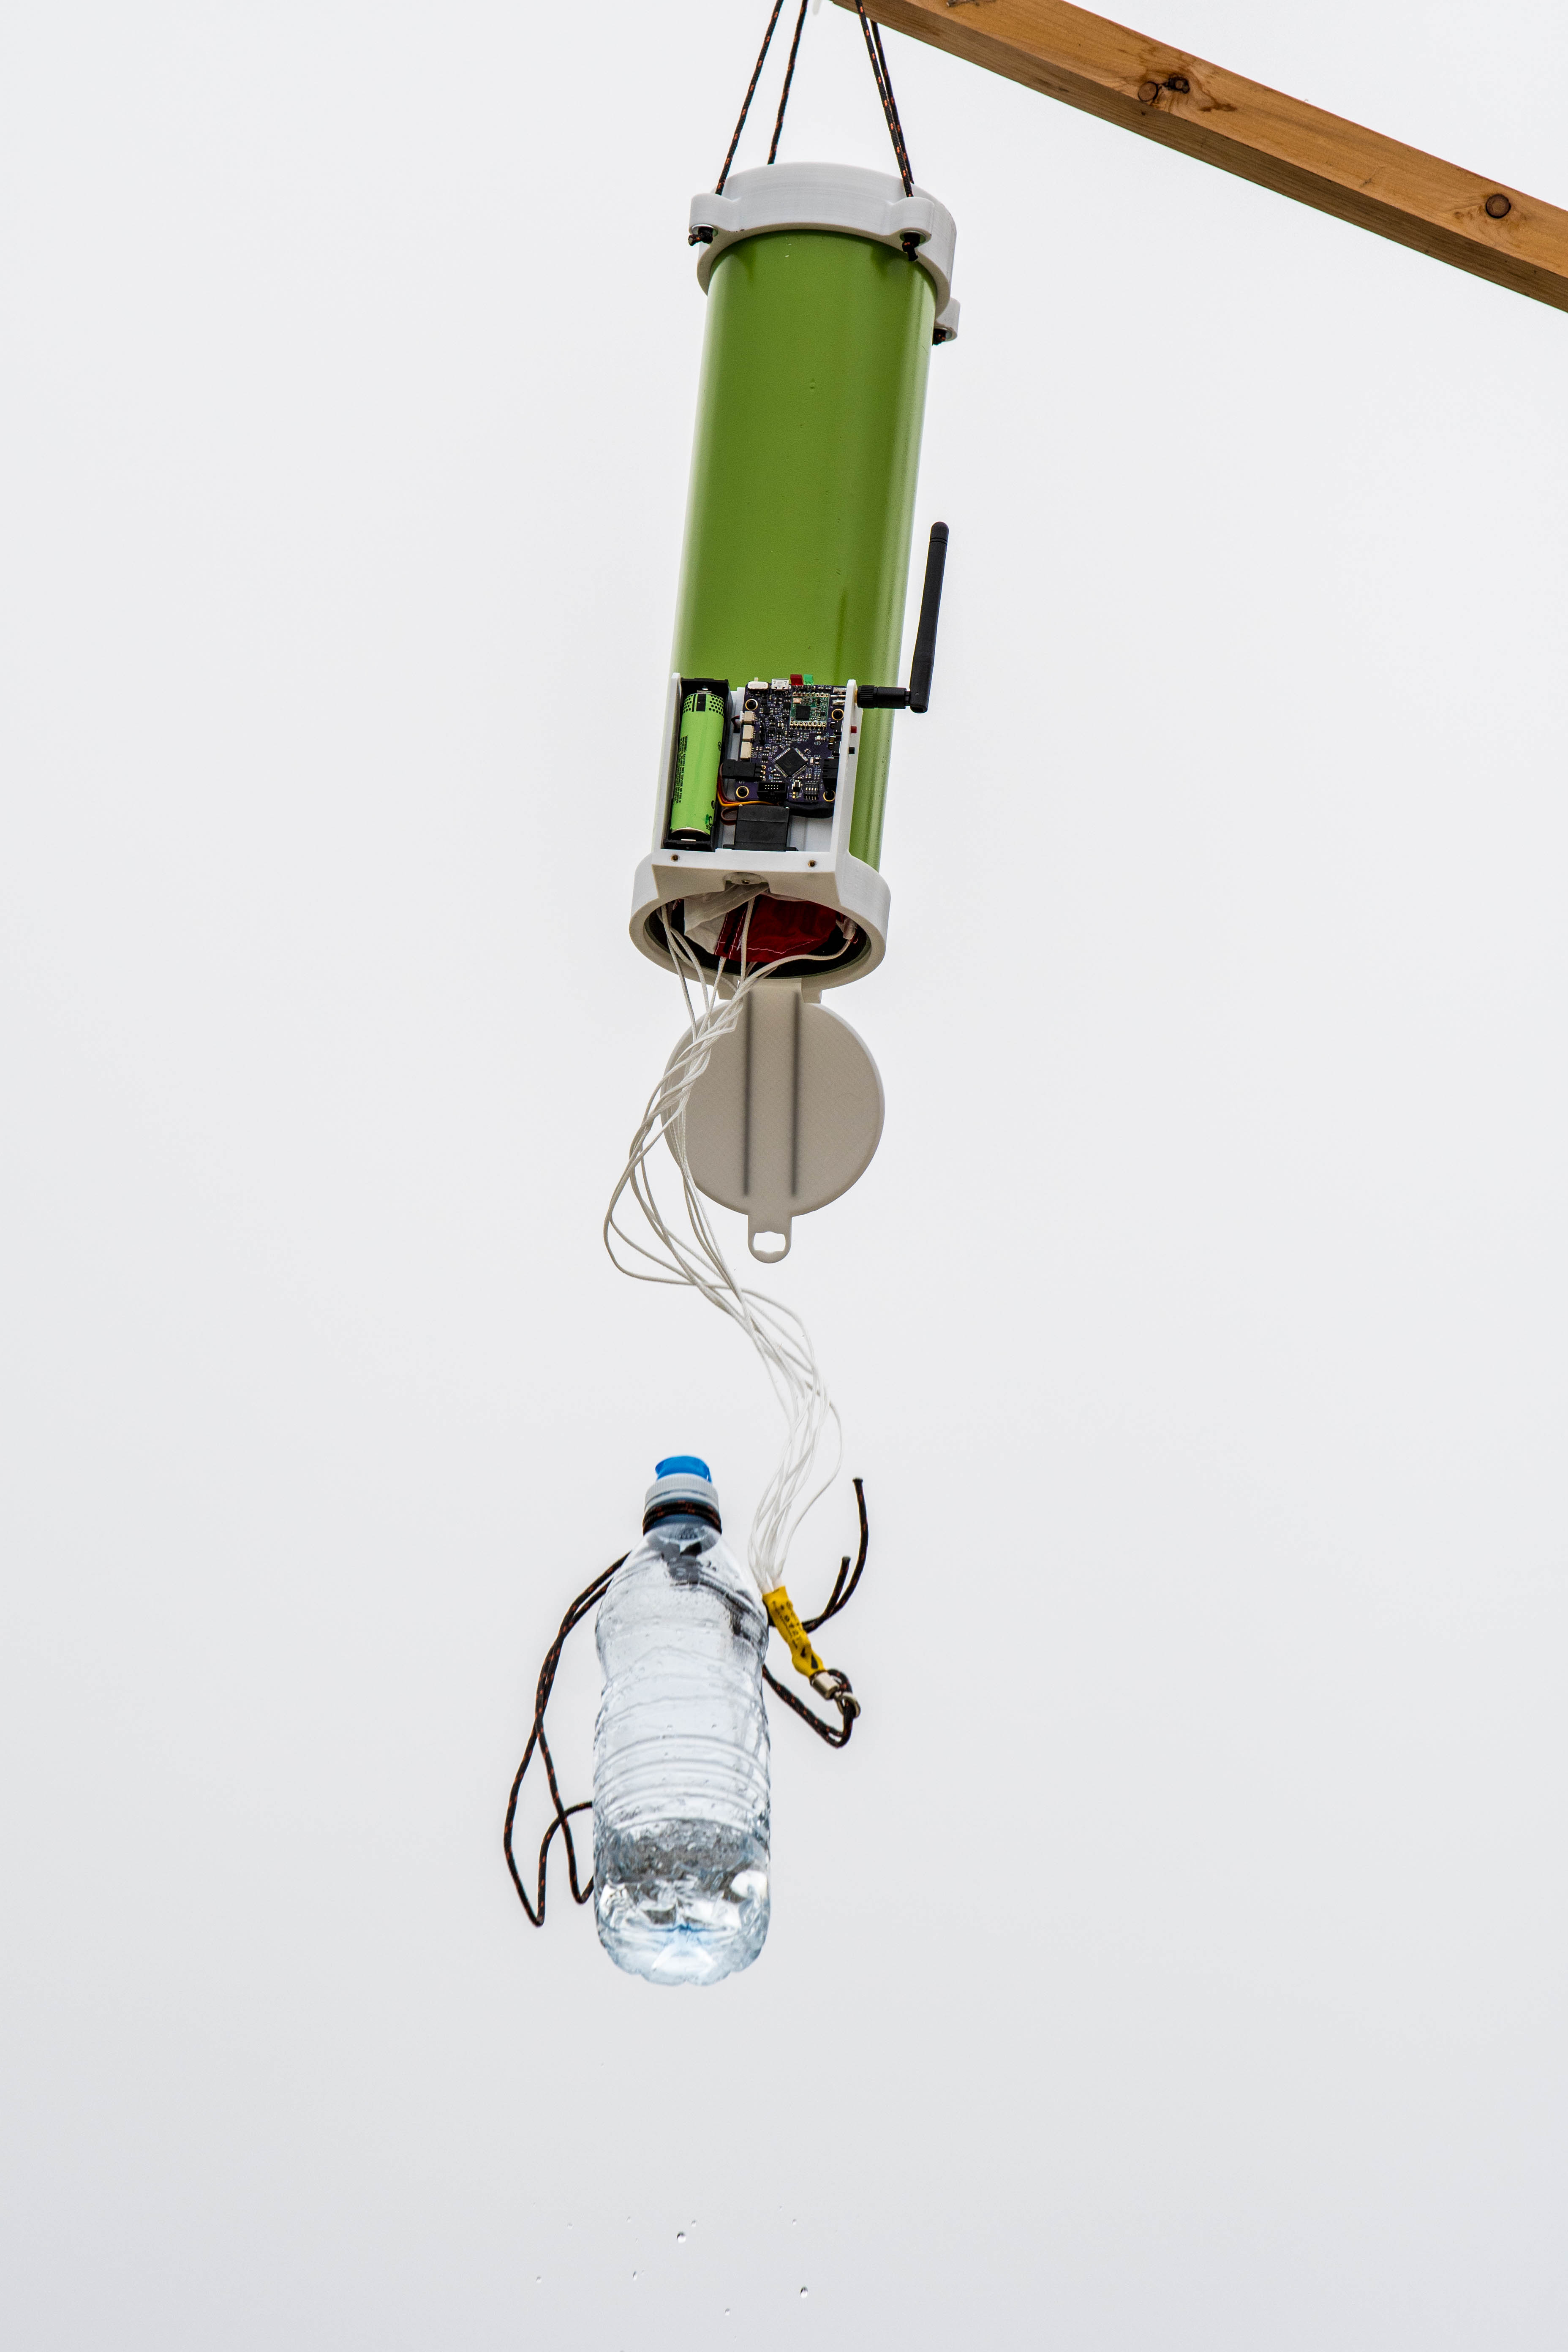
In its most simple form, a launcher basically is a tube with a hatch on the bottom, a lid on the top, and some anchor points for the shroud lines that hang it under the balloon.

The tube is made from a standard 100mm x 1m PVC pipe. Cut in three segments of about 33cm each, this is ideal for a CanSat (which, according to the specifications of the competition, must fit inside a cylinder of diameter 80mm and of height 200mm) while leaving some room above for the parachute. Each launcher is painted with a different bright color to make it easier to select the correct one on the remote.


All the other structural parts are FDM 3D-printed. This is where some constraints on the material needed to be taken into account :
– these launchers will probably be used for at least 10 years (hopefully more), so the parts need to be durable
– they will be used under load in direct sunlight during the summer, heat resistance is therefore an important concern (you don’t want the launcher and its CanSat falling from the balloon because the anchor points melted in the sun)
– some parts, especially the hatch, had to be fairly rigid
– tolerances of some joints had to be relatively precise
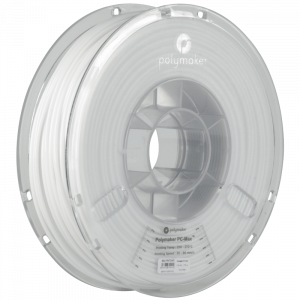
I was given a reasonable budget for this project so filament cost was not a big issue and I needed a good-quality material. The requirements for high heat resistance lead me to the new polycarbonate filaments offered by Polymaker, the Polymax-PC. I’ve been using their Polymax-PLA for some time and I am pretty happy with this material, so I decided to give the PC a go. At this time they only exist in black and white, so I chose white in order to minimize heating under the sunlight.
The results of a few test parts proved very satisfying, except maybe for the rigidity which could be a bit too low for the hatch (this is not really surprising for a material that is supposed to be tough, rigid materials are usually more brittle). This problem was solved using carbon fiber reinforcement (more on that later).

Five different parts were needed for each launcher :
– the bottom ring, which also houses the electronics module, the battery and the servomotor
– the hatch
– the cover of the electronics compartment
– the top ring with the anchor points
– the lid
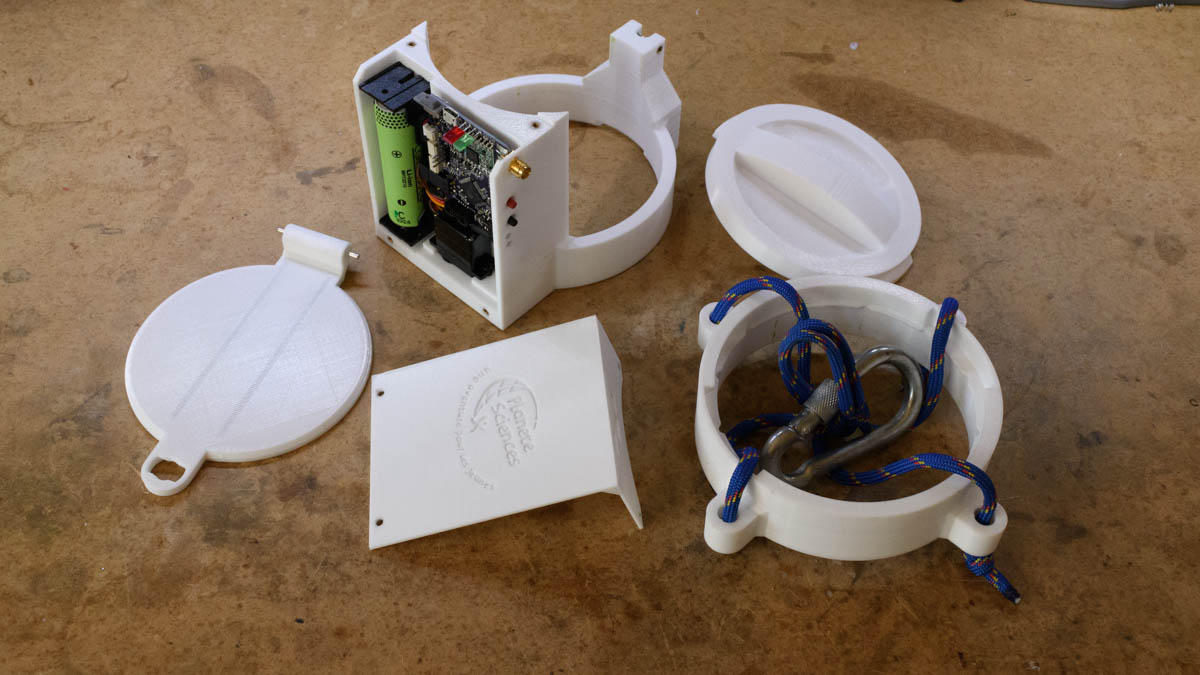
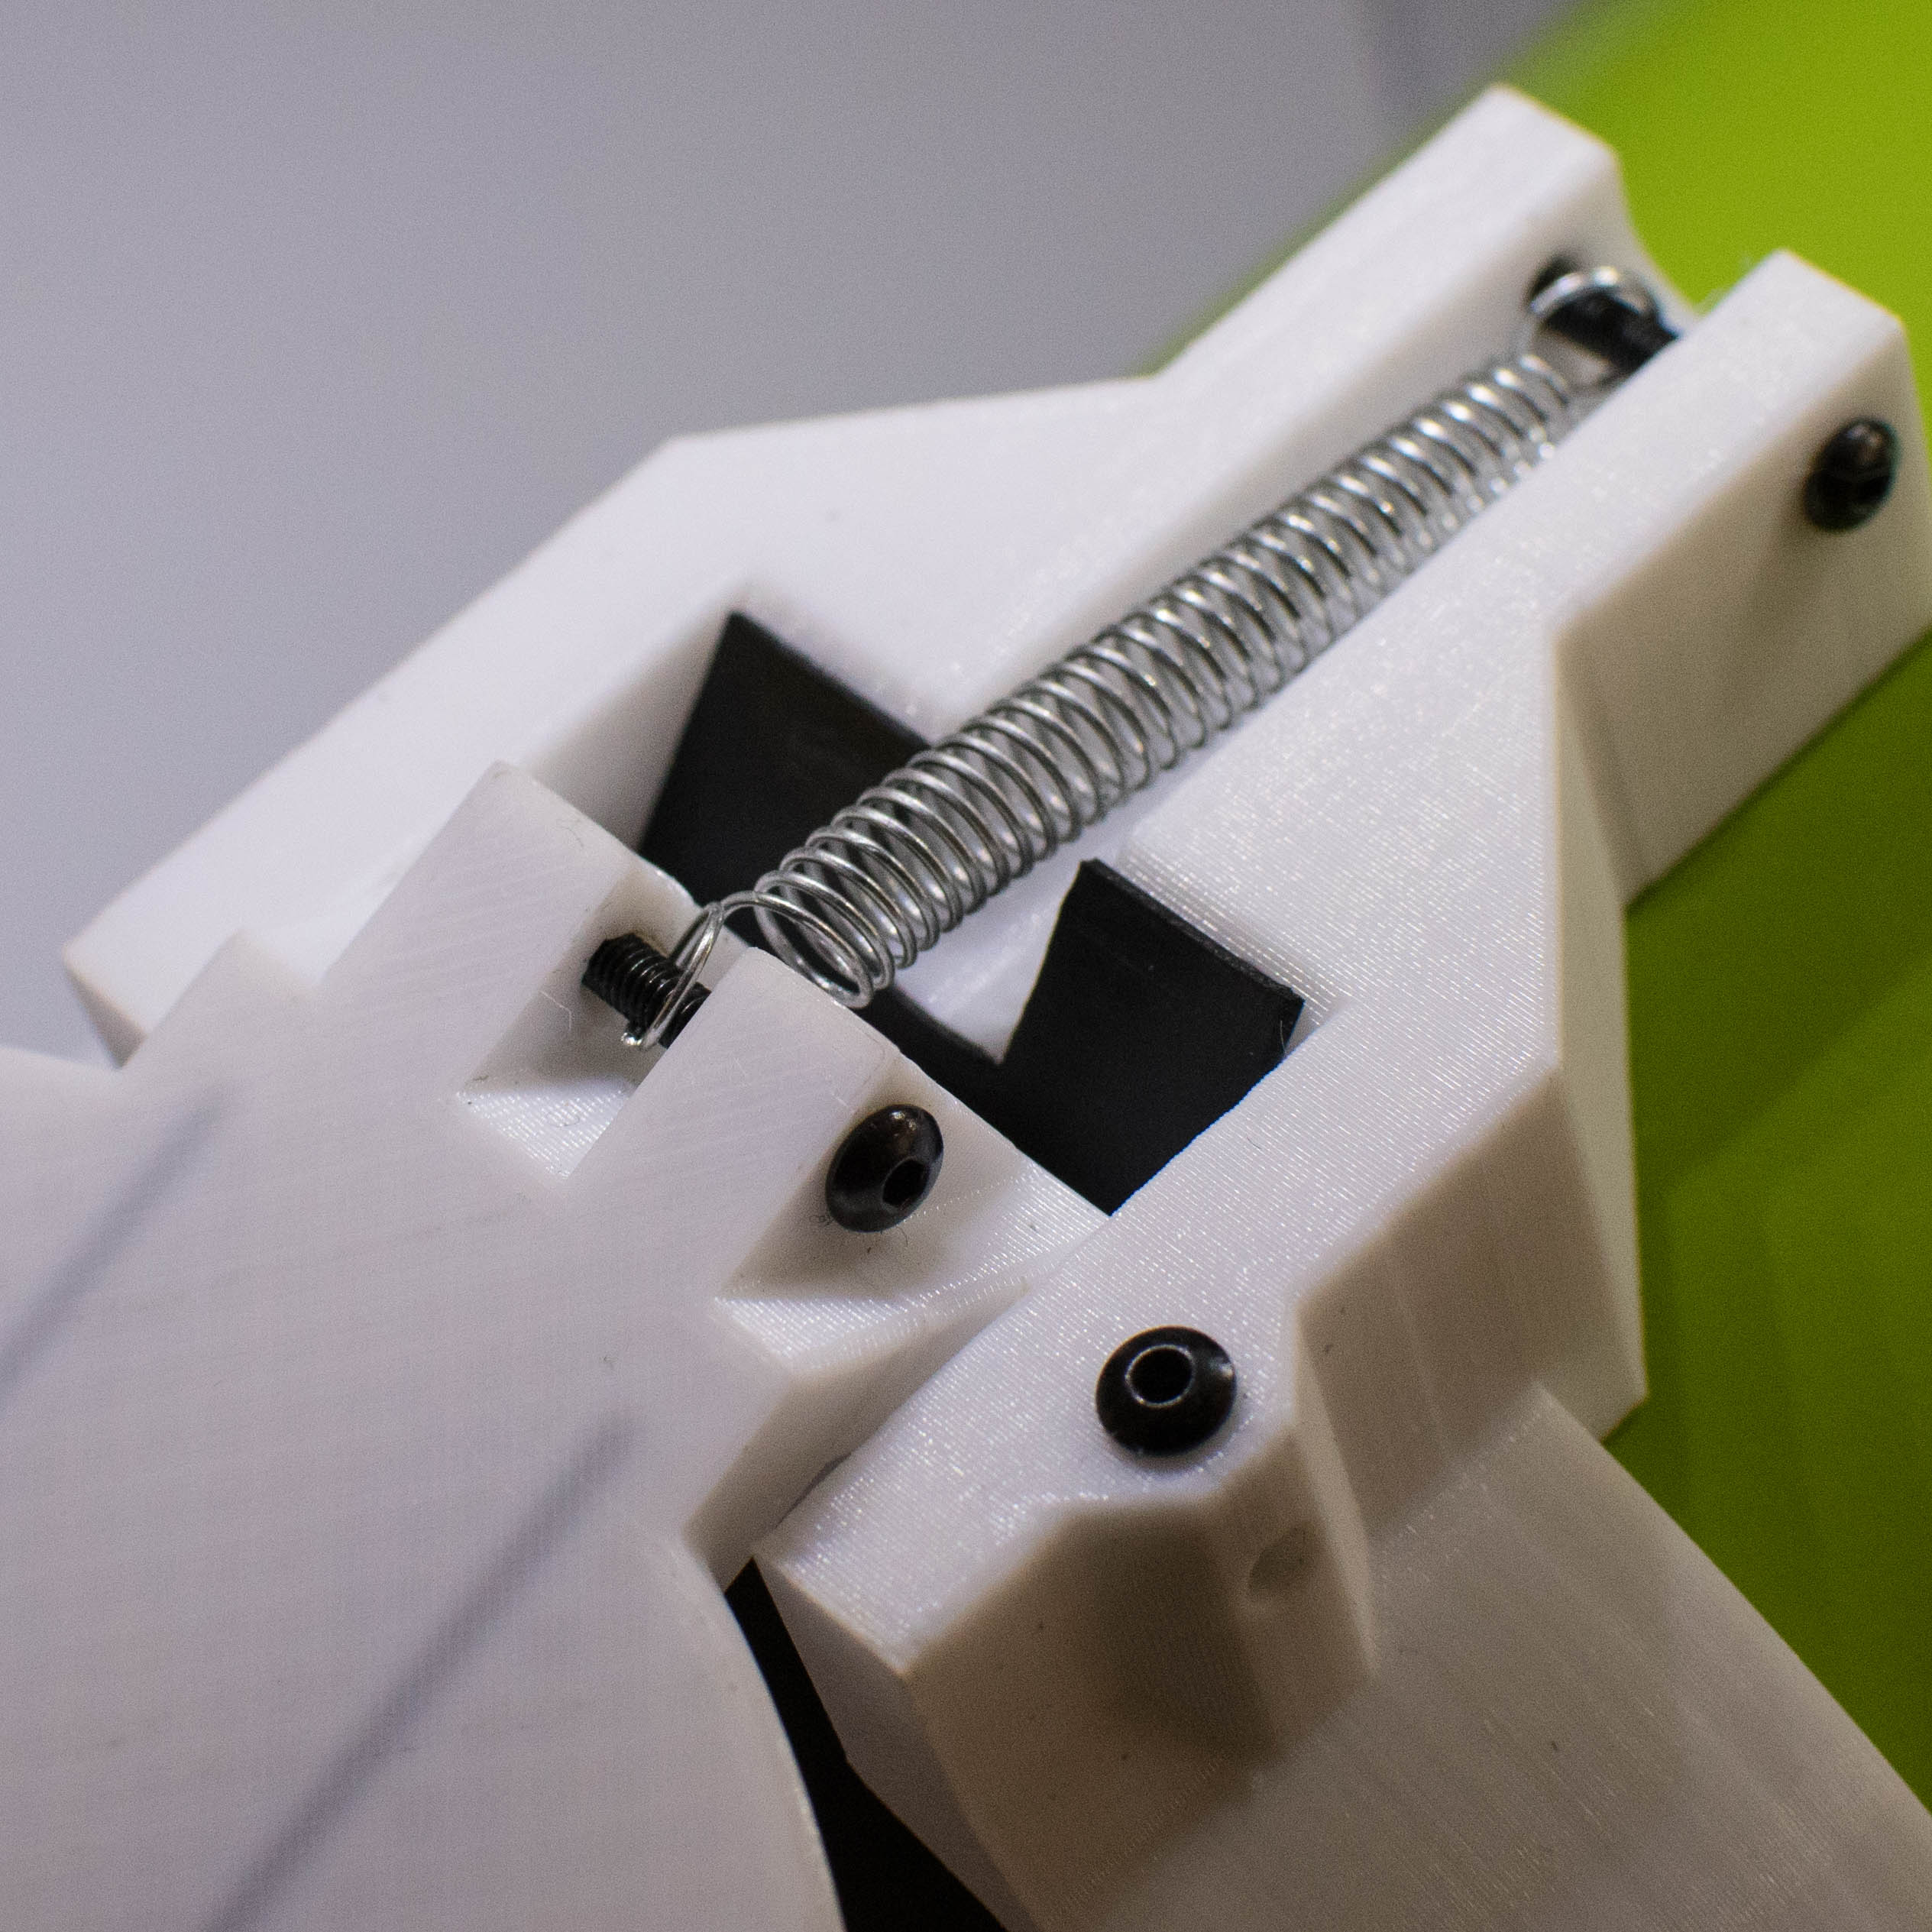
All the parts are joined together using M2.5 screws and brass inserts, inserted into the polycarbonate using a soldering iron. Both main rings are adjusted to fit in force around the PVC tube (I planned to hold them with epoxy, but it turns out that this is strong enough this way, and it still can be taken apart for repairs if necessary).
The hinge is made of a metal rod and a length of teflon tubing to reduce friction. A spring helps the hatch blow clear when the release mechanism is opened using the servomotor. The rigidity of the hatch is improved with two 1x3mm carbon fiber rods inserted directly into the parts during the print.
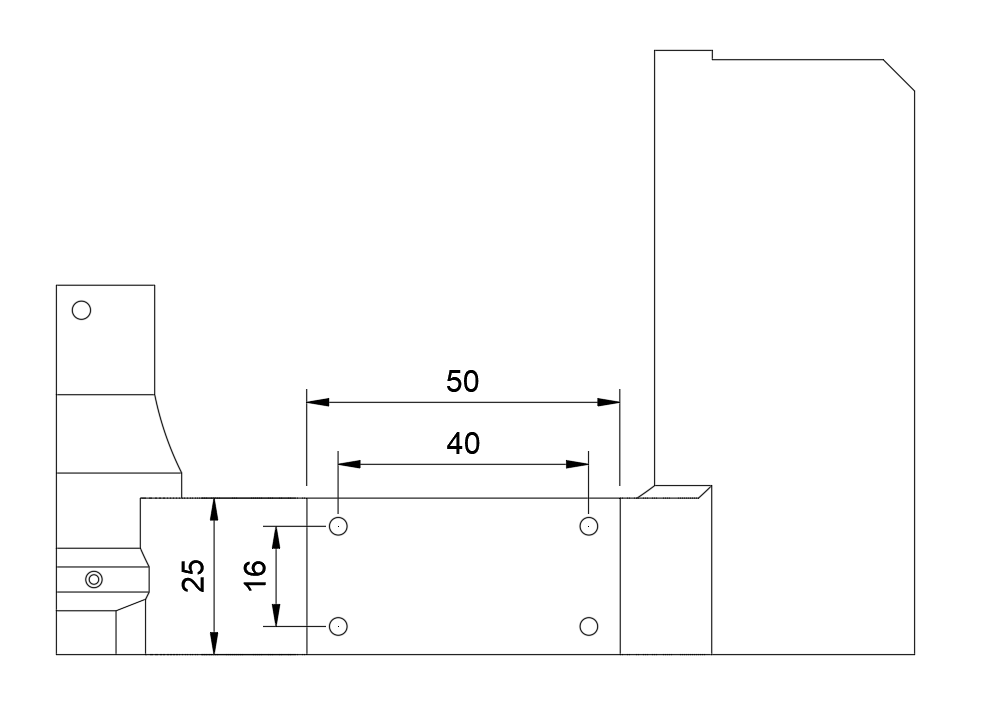
An “extension plate” with documented dimensions is available on each side for future developments (such as fixing a camera, some sensors, …).

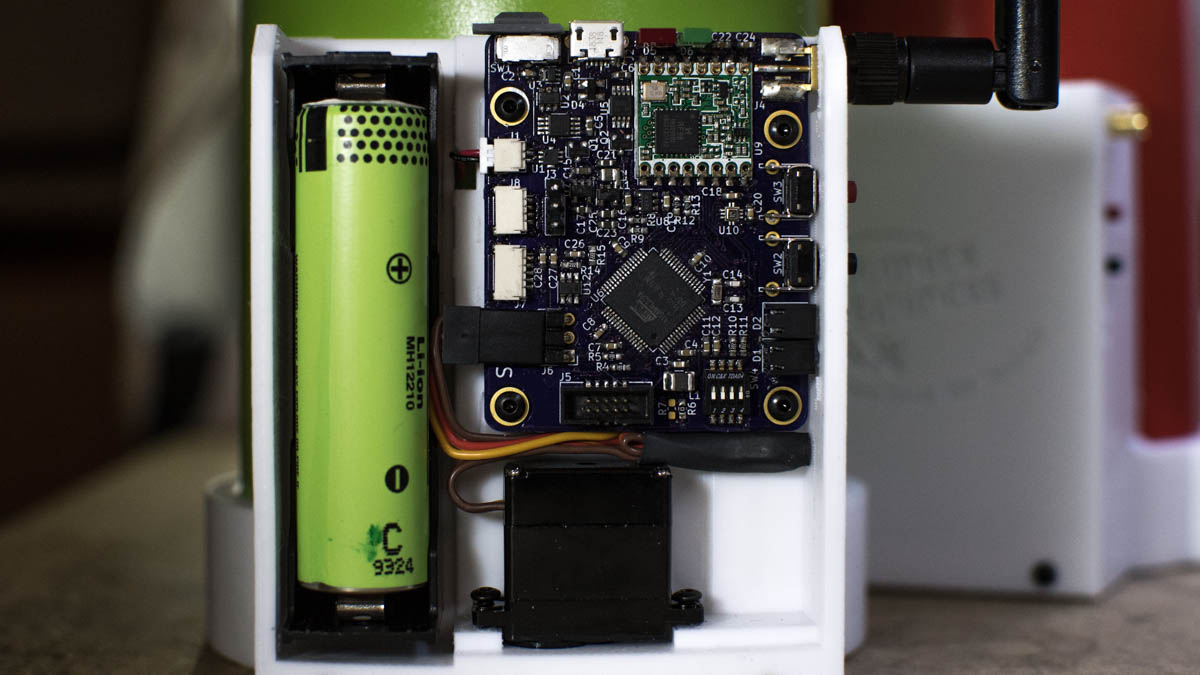
Electronics
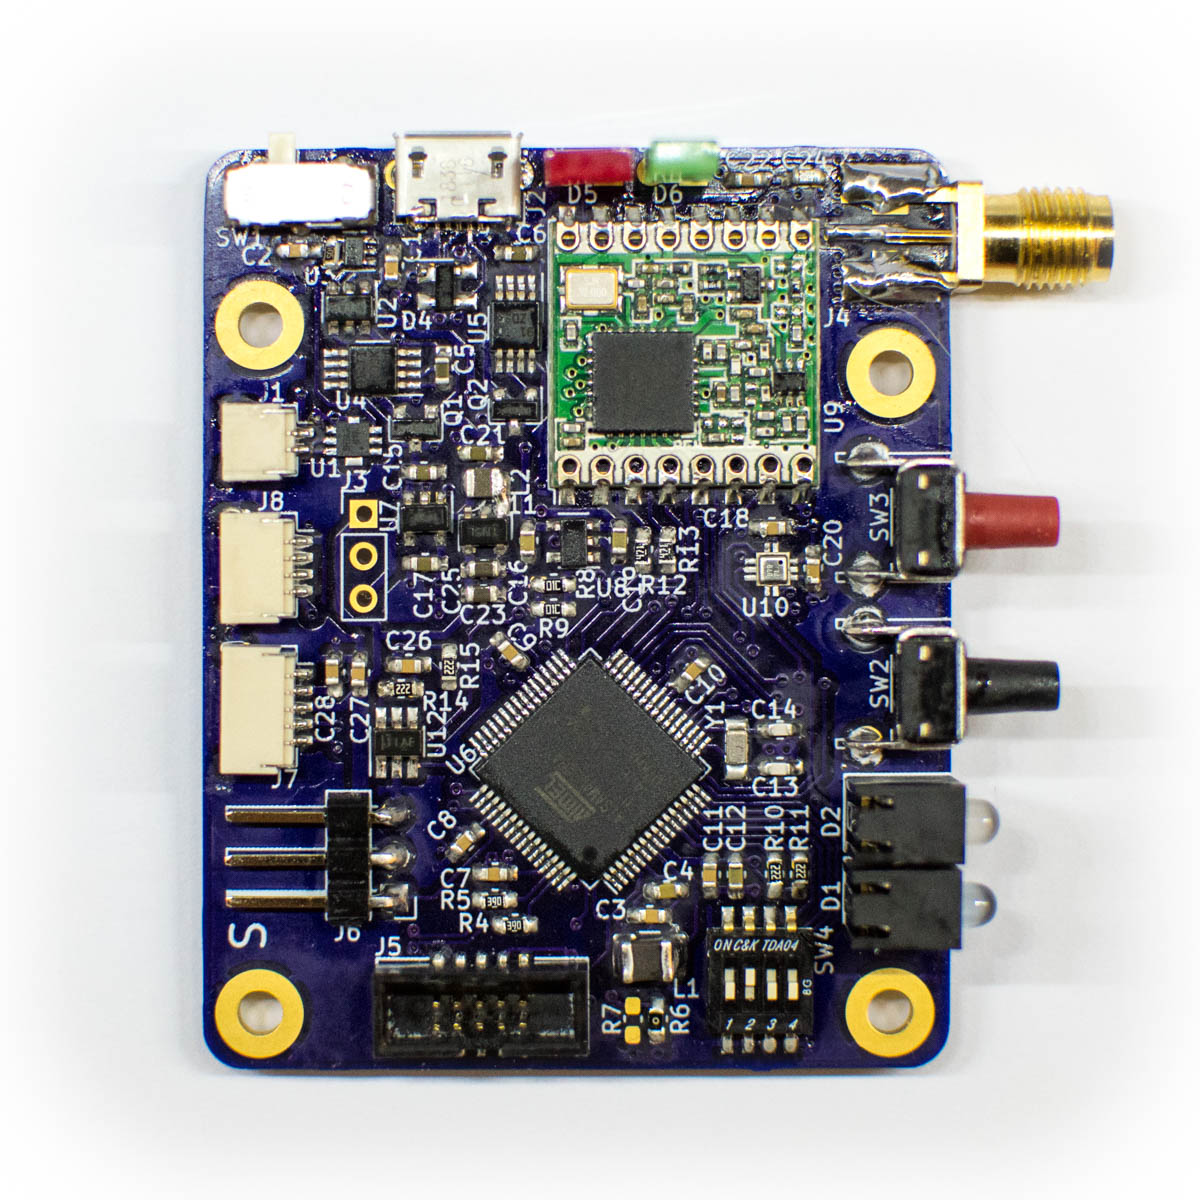
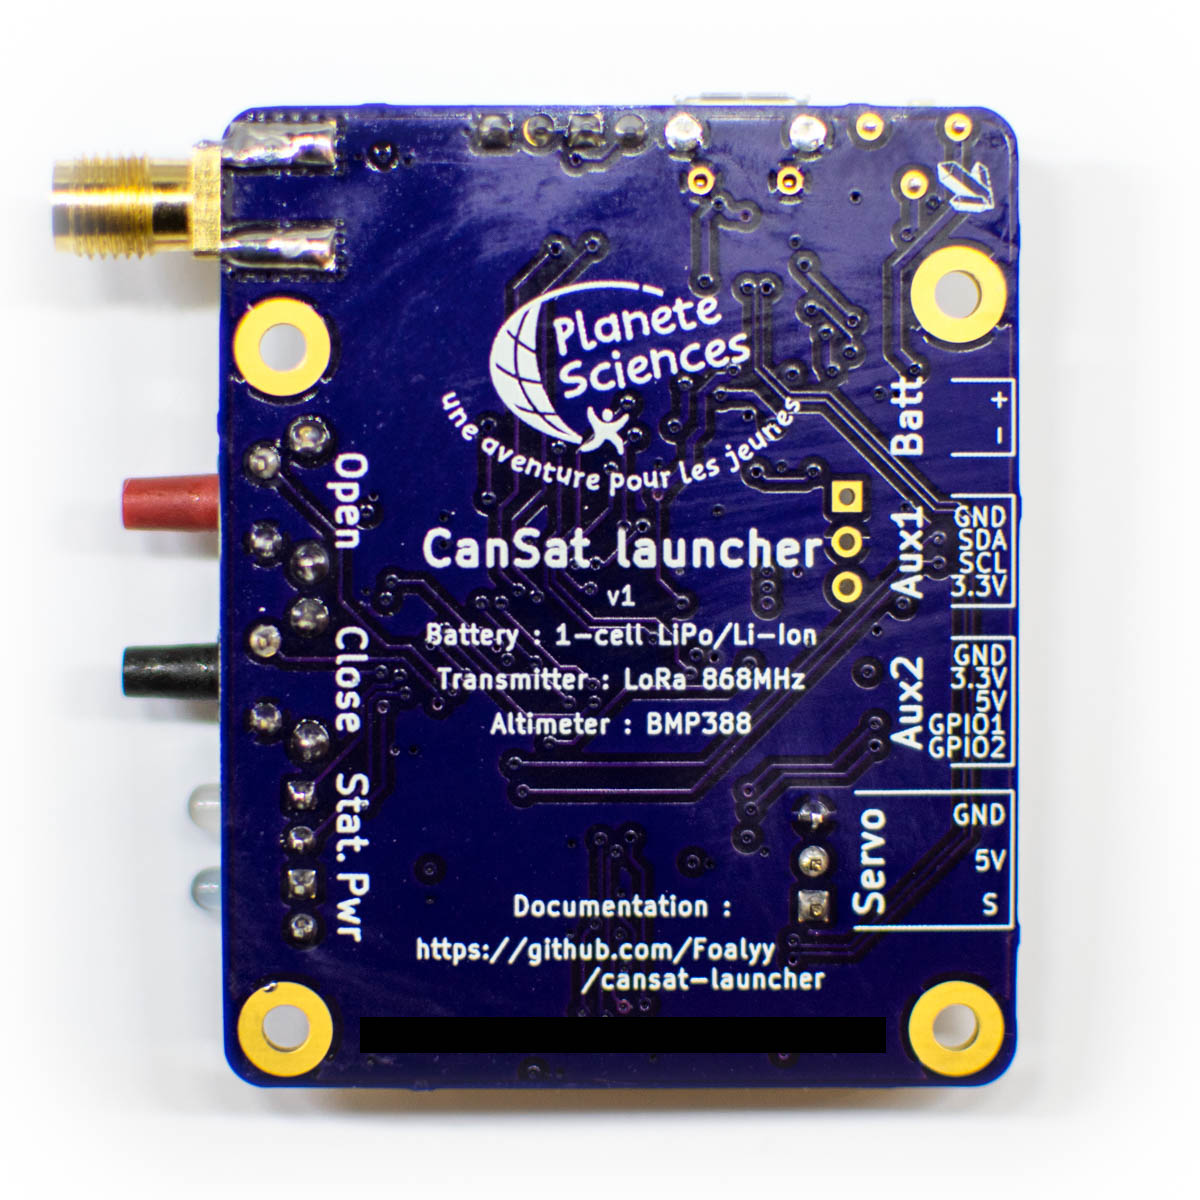
All the electronics embedded in each launcher fits on one PCB. It is mainly composed of :
– a power stage with charging and miscellaneous protections (mainly reverse-polarity and under-voltage) for the 18650 lithium cell that powers the launcher, a 3.3V LDO for the logic circuit, and a 5V step-up for the servo
– an ATSAM4 microcontroller running the libtungsten library, as in all my projects
– a LoRa transmitter to receive launch orders and send telemetry data
– a BMP388 pressure sensor to act as an altimeter
– a servomotor
– a micro-USB connector for battery charging
– configuration micro-switches used to assign every launcher an ID on the telemetry without hard-coding them
– two push buttons to manually open and close the hatch
– two status LEDs (hatch status, and telemetry activity)
– a few extension ports (power and data) for potential future extensions
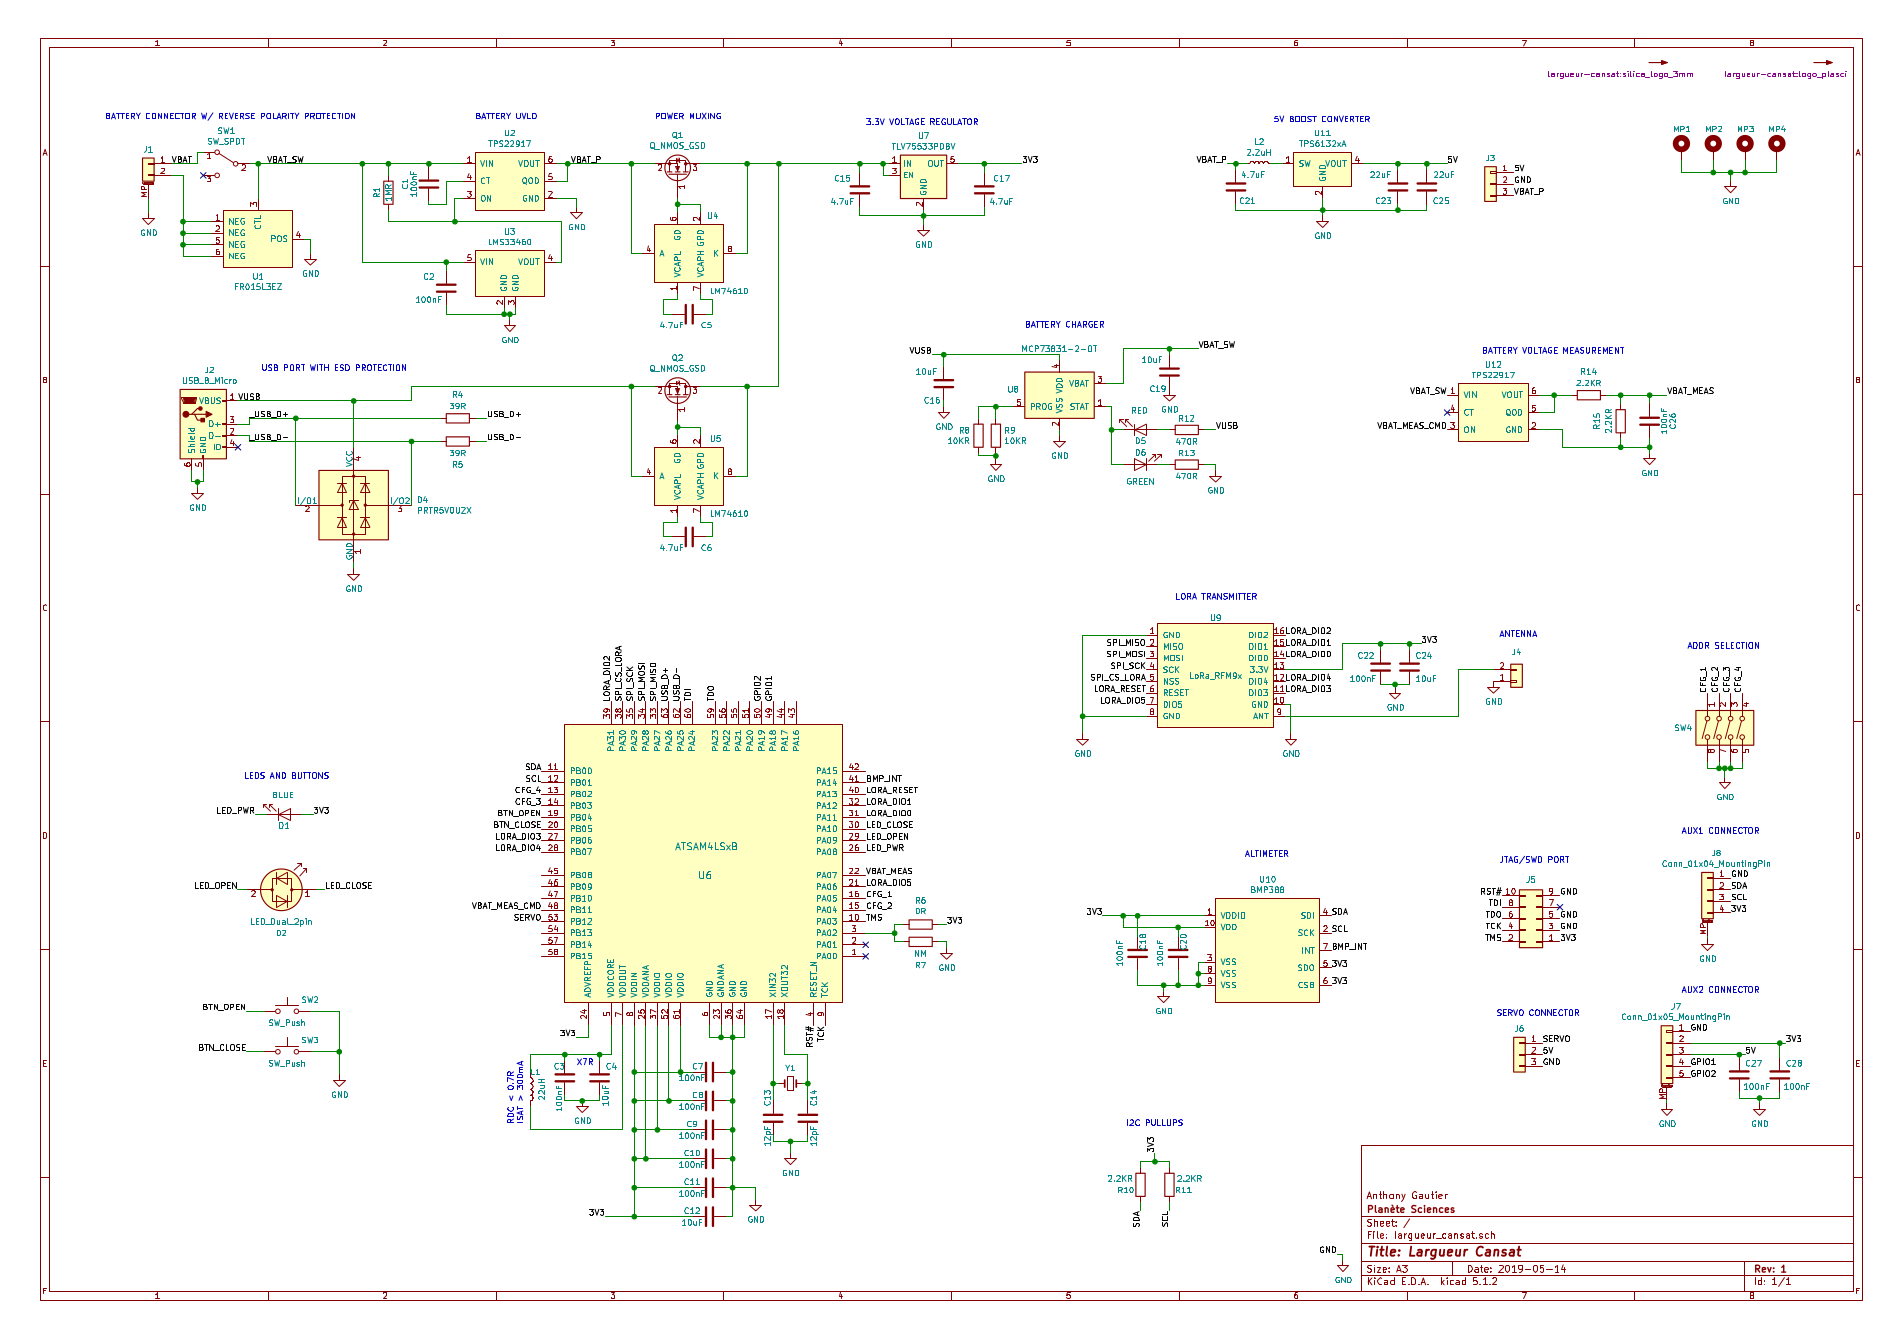
The PCBs are designed using Kicad, made by OSHPark and hand-soldered.
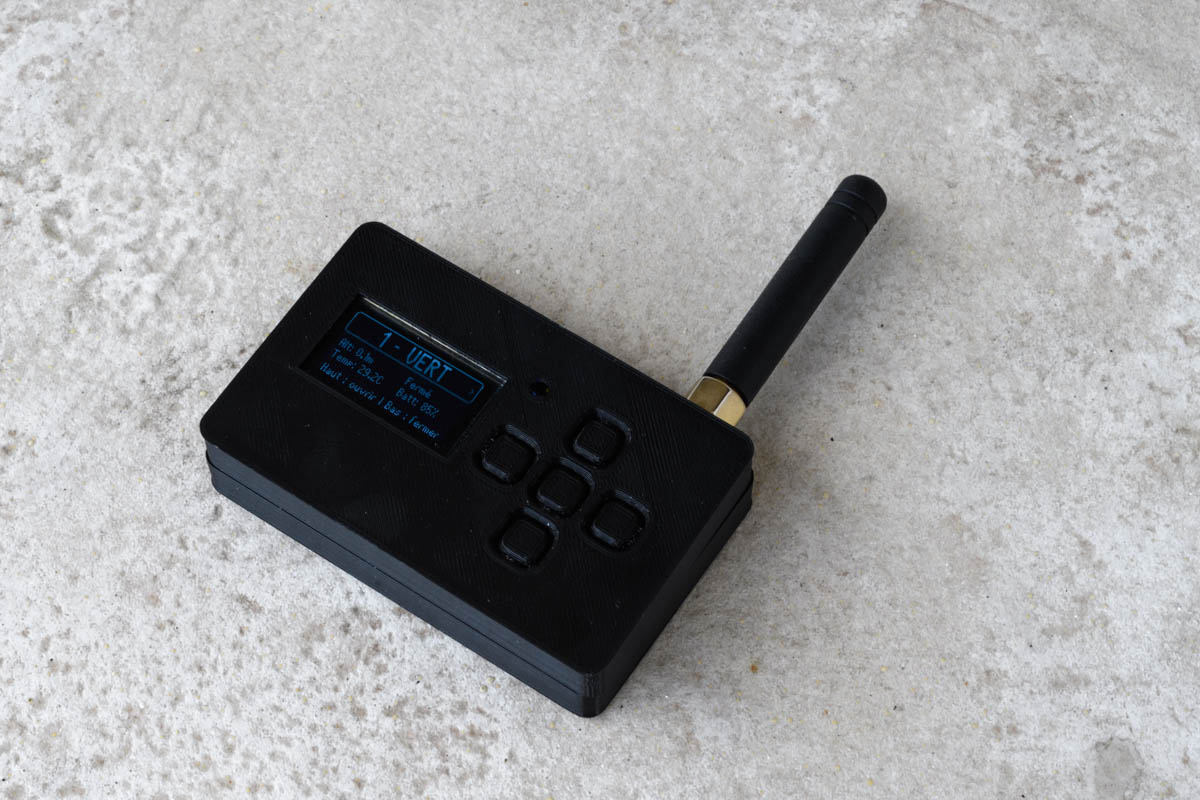
Remote control
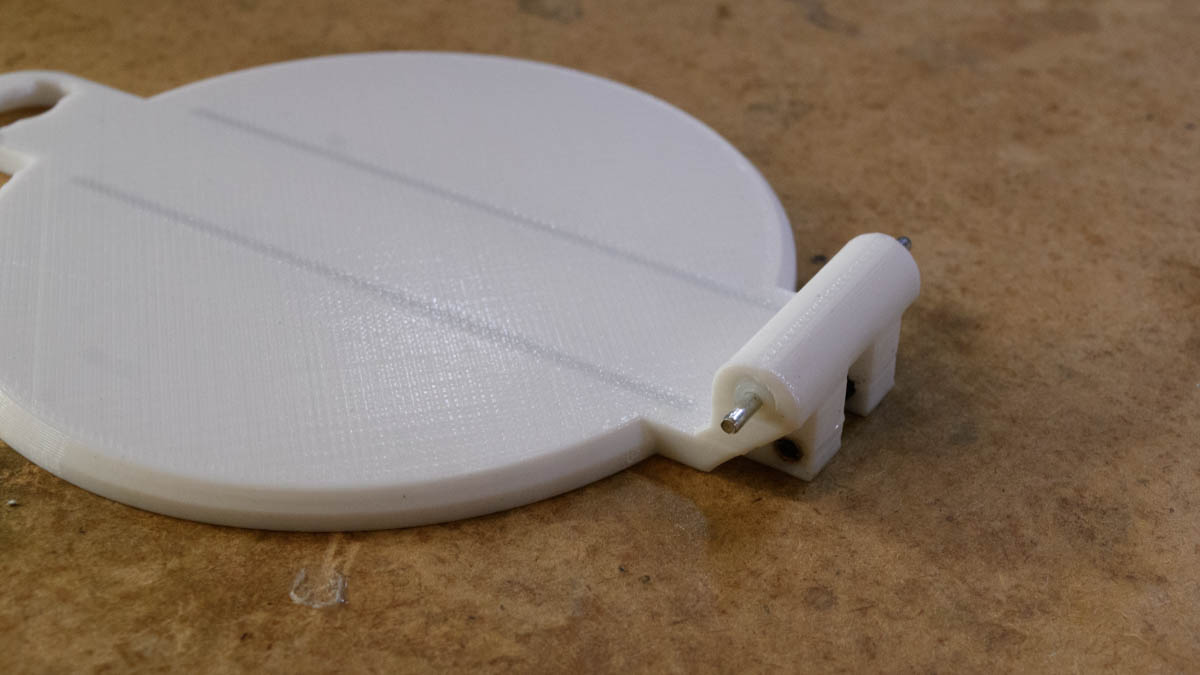
The launchers needed a battery-powered remote control capable of displaying the telemetry data (especially altitude and battery voltage) and controlling the hatch over a LoRa channel. A Silver module with its battery, buttons, LoRa transmitter and small OLED display, would fit the bill perfectly with a custom firmware.
This firmware is relatively simple. The current launcher, identified by its color (green, red or yellow), can be selected using the left and right buttons. The up button opens the hatch while the down button locks it. The display shows the launcher’s altitude, temperature and battery status.
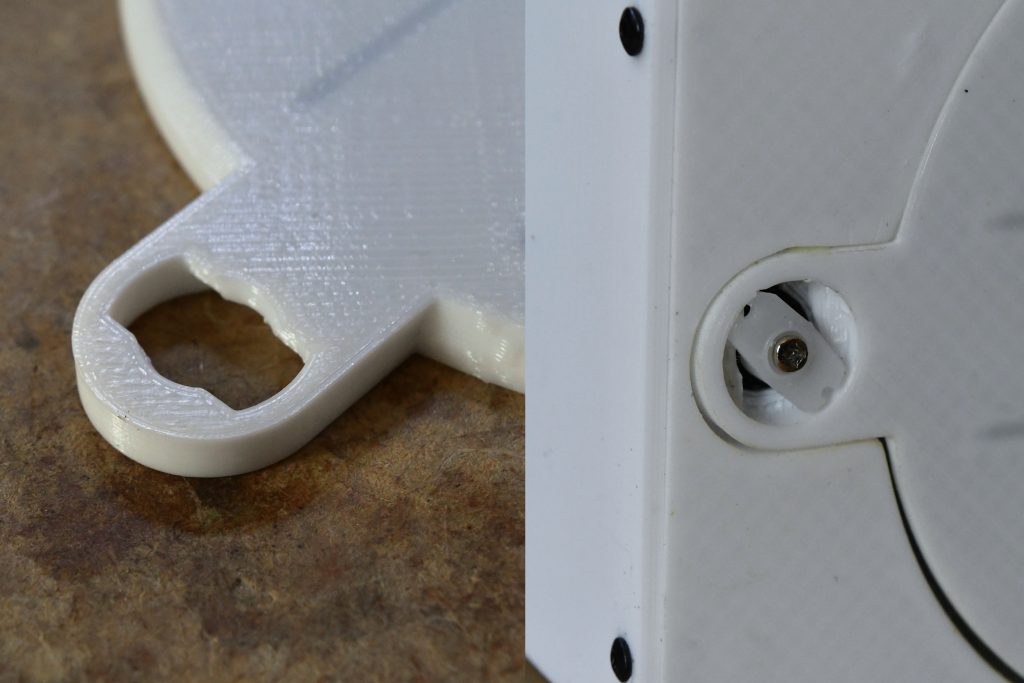
Since I am working on a improved version of the Silver modules these prototypes didn’t have a case yet and I was running out of time, so I quickly FDM 3d-printed one. It might never win any design prize, but it works fine for its purpose. I may try and make a better one for next year.
Tests
I didn’t have a balloon, but I had a friend with a second floor window and an everlasting motivation for fun experiments. I didn’t have a CanSat either, but I had a bottle of water and the parachute for my experimental rocket. Let’s see how it goes.
The altimeter also seemed to work, indicating about 6m above the floor, which sounded about right. This will be a useful feature because the current way of determining the launch altitude is to measure the length of cable under the balloon by counting flags fixed at regular interval, and this method only gives a rough estimate when the balloon drifts because of the wind.
Followed range testing, which showed a decent reliability even a few hundred meters away in dense urban area, which should be good enough for a 200m-max distance in direct line of sight during the competition. To be on the safe side, I still implemented an acknowledgement system between the remote and the launcher to automatically send the order again if it appeared to not have been received.
Wrapping up
For the storage and transport of the launchers, I bought two sturdy suitcases from Amazon. One of them contains the first launcher, the remote and a bag of accessories (the antennas, spare batteries, a USB charger with three cables, spare shroud lines, …), while the other one contains the two other launchers.
Everything performed as expected during the event, and all the CanSats were launched. One thing that I didn’t have the time to test beforehand was the autonomy on batteries : ideally, the launchers should last the whole campaign without needing a recharge. This turned out to be way more than enough : when I got back the launchers at the end of the event, they all had more than 80% battery left according to the embedded gauge. Having such a margin is good news because the batteries should last for years and still give enough autonomy even when they start to age. The altimeter also proved very useful and, as expected, more practical and more reliable than counting flags.
Sources
Everything is available on Github :
- Doc and CAD files : https://github.com/Foalyy/cansat-launcher/
- Kicad project : https://github.com/Foalyy/cansat-launcher-kicad
- Main board firmware : https://github.com/Foalyy/cansat-launcher-firmware
- Remote control firmware : https://github.com/Foalyy/cansat-launcher-firmware-remote