Synology DiskStations are awesome. The DSM web interface is both powerful and easy to use and is constantly improving. One thing I have struggled with, though, has been setting up public key authentification in order to allow automated scripts to push backups to the NAS via rsync. Here is how it can be done.
First, two things to keep in mind :
- By default,
rootis not allowed to connect, you need to connect with another user and usesudo su(type the password of the user you are connected with, not the root password). - Only members of the
administratorsgroup are allowed to connect by SSH. However, even non-administratorscan use the rsync service.
Public key authentification is disabled by default, you will need to enable it :
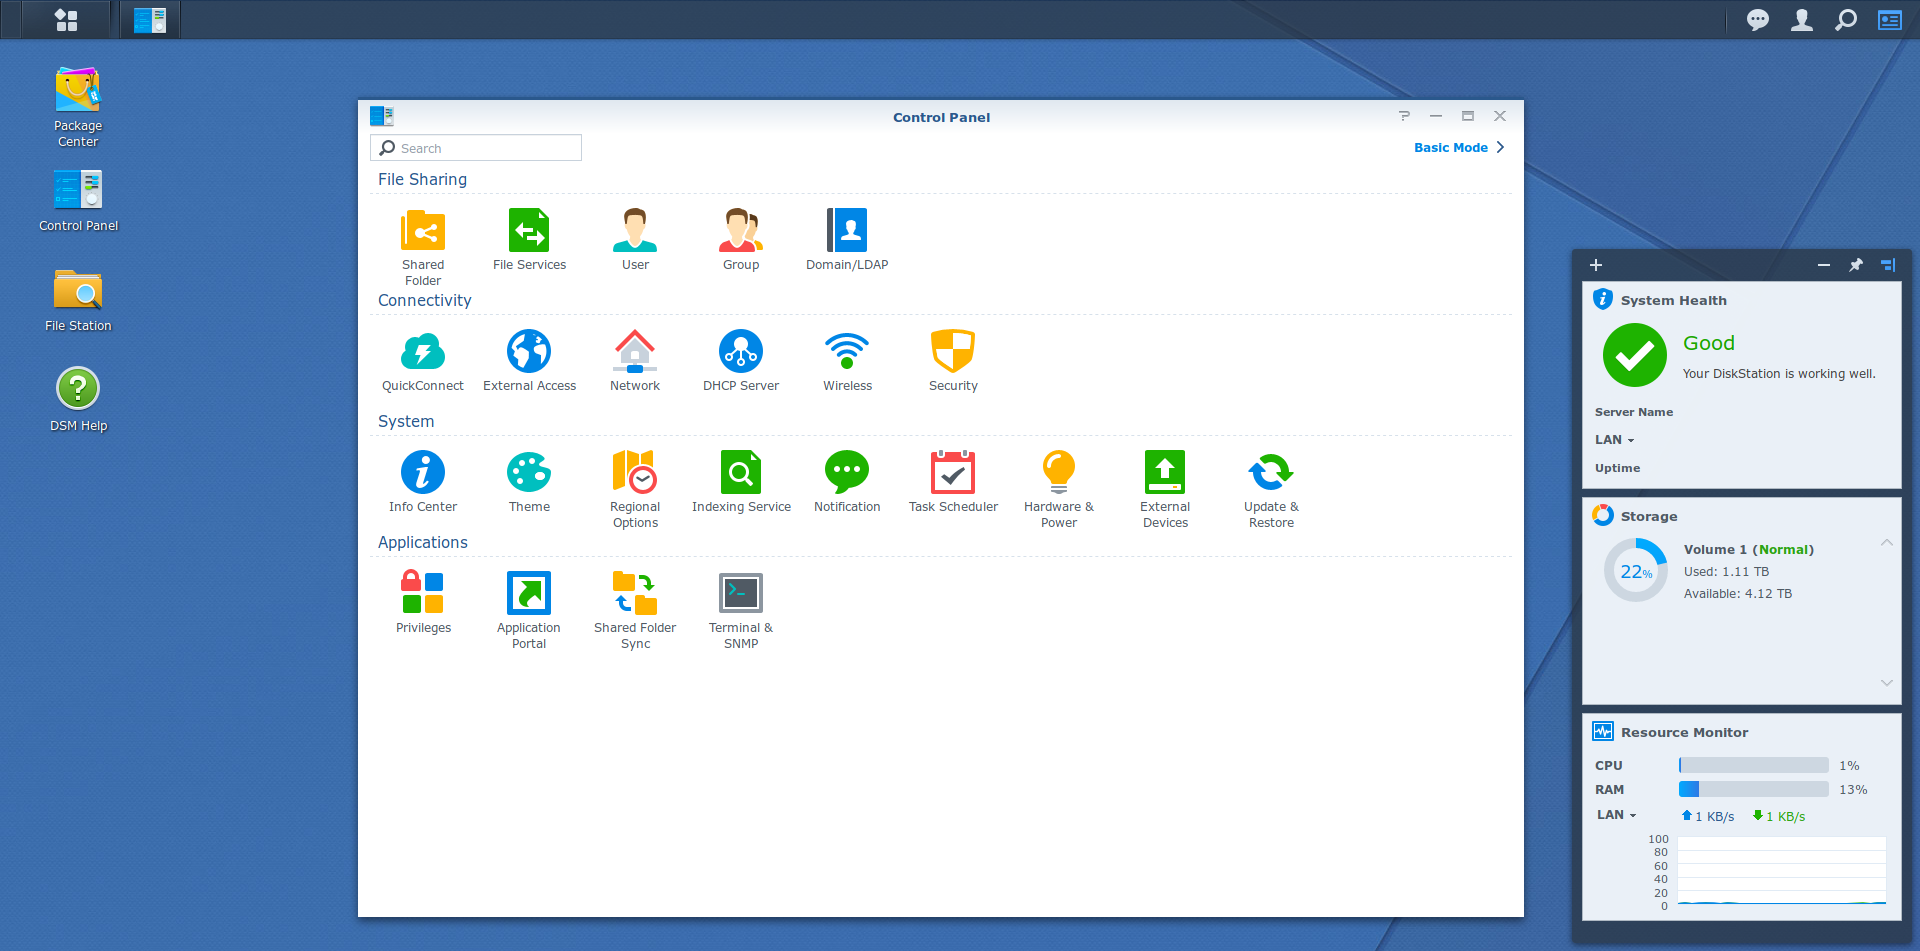
- make sure the SSH service is enabled in Control panel > Terminal & SNMP > Enable SSH service
- set up a user account if you don’t already have one (mine will be called
foaly) and temporarily add it to theadministratorsgroup using Control panel > User > foaly > Edit > User groups) - log into the NAS via SSH :
ssh foaly@[nas-ip]in a Linux terminal or use Putty on Windows - log into a root session :
sudo su - edit the SSH service config :
vim /etc/ssh/sshd_config - uncomment the lines
PubkeyAuthentication yesandAuthorizedKeysFile .ssh/authorized_keys(make sure not to change anything else, otherwise you could lock yourself out of SSH) - restart the SSH service, either using
synoservicectl --restart sshdor by disabling and re-enabling the SSH service in Control panel > Terminal &SNMP - if you added your user to the
administratorsgroup at the beginning of this procedure, you can now remove it form the group (except if this is the same user you want to add keys to, keep reading)
Now that public key authentification is enabled, you need to exchange keys for each host and user that need to be able to automatically authenticate. Let’s assume you want to allow a remote server to authenticate with the user backup :
- add the
backupuser to theadministratorsgroup - connect to the server and generate a key pair if don’t have one already :
ssh-keygen -t rsa - copy the public key to the NAS :
ssh-copy-id backup@[nas-ip](you will need to enter the password of thebackupuser) - this is important : connect to the NAS by SSH and check the files permissions :
chmod 0711 ~chmod 0711 ~/.sshchmod 0600 ~/.ssh/authorized_keys
- now, the authentification should work : from the server, try to log in to the NAS (
ssh backup@nas-ip) and check that it logs in without requiring a password - if you only want to use rsync with this user (not SSH) you can now remove the
backupuser from theadministratorsgroup
Note : if this still does not work, take a look at the answers in the comments below for troubleshooting ideas.
In order to push data via rsync on the NAS, here are the steps to follow :
- make sure the rsync service is enabled in Control panel > File Services > rsync > Enable rsync service (do not check Enable rsync account)
- choose (create if necessary) the shared folder you want to push to, for example Backups
- fire rsync with something like this :
rsync -az /var/www backup@[nas-ip]:/volume1/Backups/
Here is an example of a more complex rsync command :
rsync -az -e "ssh -p 23342" --backup --backup-dir="rsync_bak_`date '+%F_%H-%M'`" --exclude 'tmp*' --exclude 'cache*' --exclude 'logs' /var/www backup@[nas-ip]:/volume1/Backups/
This will :
- connect to the randomly-chosen port 23342 : this is useful if your NAS is an a local network behind a router/firewall/NAT, you can configure the NAT to redirect the external port 23342 to the port 22 on the NAS (this can make your configuration safer against bots looking for open SSH ports to exploit)
- keep a copy of the previous version of each modified file in a dedicated folder with the current date, every time the backup is performed
- exclude some useless directories from the backup
Awesome! Thank you so much, saved a lot time
spoke too soon, doesn’t want to work, keeps asking for a password
I had left out the
chmod 0711 ~
for the user and now it works
Hi Neil, indeed that’s one of the important parts that’s easy to miss, I lost hours because of that. Glad you made it work!
After doing all the above, does Security Advisor of Synology give you several warnings, such as:
1) error with the homes folder
2) FTR should have default UNIX permissions
3) change the SSH port
Hi Patrick,
I don’t think these warnings have to do with the key authentication procedure. I don’t have the first two you mention, and to be honest I don’t know what they are about. The third one is self explanatory, I have too but it doesn’t matter in my case because the port is only available from my local network.
I believe the first warning is because the homes checkbox is not checked in control panel
User->Advanced->User Home==>Enable user home service for that user
This is the error i have when i try to copy over the server key to the NAS:
~/.ssh> # ssh-copy-id rsync@10.223.27.85
rsync@10.223.27.85‘s password:
Could not chdir to home directory /var/services/homes/rsync: No such file or directory
mkdir: cannot create directory ‘.ssh’: Permission denied
sh: .ssh/authorized_keys: No such file or directory
I have the same issue. Help would be much appreciated!
Can you check that this setting is enabled in your Control Panel ?
Control Panel > User > tab Advanced > section User Home at the bottom > Enable user home service
Then maybe disable and re-enable the SSH service, and make sure that the user you want to add keys to is in the Administrators group.
Such an amazing resource and clear instructions. Maybe this point could be added in the main body, to avoid the additional troubleshooting step
Amazing man! Thank you!!!
Hi,
I’ve got a slightly different setup where the Synology NAS is performing an ssh to another machine. I got everything working to the point where the ssh user@host asks for the passphrase of the public key. After entering this, the ssh connection is successfully established, however the next time I do an ssh, I’m asked again for the passphrase.
Debugging with ssh -vvv user@host mentions the following thing and that’s where I’m stuck:
debug3: no authentication agent, not adding key
This appears to be the reason my passphrase is not being stored, but the Synology seems to be incapable of that since it doesn’t have an authentication agent at all?? I have a DS213+ with DSM 6.2.2-24922.
Any clues?
Thanks!
Hi Raymond,
I’m not sure the “debug3” message is the cause of the problem. You mention using “ssh” but not “ssh-copy-id”, have you done that? Does your key appears in ~/.ssh/authorized_keys after that ?
Best,
Hi foaly,
The reference to ssh is when you test the connection to see if a password is asked or a passphrase. The synology does not have the command ssh-copy-id, so I copied the public key manually.
I actually found a workaround of using no passphrase when generating the ssh key, which seems ok since it is local traffic within my house.
Thanks though!
Hi Raymond,
I misunderstood your first message, I thought SSH server was still asking for a password even after the keys were added. In your case, it is the SSH client which asks for the passphrase in order to open your local private key, which is expected. If the connection is successful after you enter the passphrase it means your key authentication is working correctly.
Just to make things clear for anyone reading this with a similar problem, here is a bit more explanation :
– By default, when a client wants to connect to an ssh server with a specific username, the server asks for the password of this user before allowing the connection.
– This can be avoided by using key authentication instead of password authentication : a key pair (public and private) is generated on the client side, and the public key is sent to the server and added to a list of authorized keys. Anyone with the corresponding private key stored locally can connect to this username on this server without needing a password anymore. This is a bit like storing the password on the client side and sending it automatically when the server asks it, but way more secure.
– However, if the private key gets stolen on the client (stolen computer or hacked operating system for example), the thief will be able to use it to connect to the server. In order to prevent that, the private key can be encrypted locally with a passphrase (but it is not mandatory). Without knowing the passphrase, the key is worthless.
– Now, it looks like we got back to square one : a password/passphrase is asked every time we need to connect. In order to mitigate this inconvenience, ssh provides a software called an ssh agent, which role is to keep your private key in memory once it has been decrypted. This way, you only have to enter your passphrase once per session (of the local client). Further connections later in the day will succeed automatically but if you log out or reboot your computer, the agent will ask for the passphrase again.
In your case Raymond, using a passphrase doesn’t seem convenient because you don’t want to have to enter it for every connection (as I understand, these are automatic scripted connections of some sort, such as for backups) and I don’t see an easy way to use an agent and give the passphrase every time your NAS reboots. Storing the passphrase on the NAS to use it automatically would defeat the purpose of using a passphrase in the first place. In my opinion the best (and probably only) solution is to not use a passphrase. The connection will still be secure, even through the internet, because the key authentication scheme is strong.
Your only risk is if someone steals your NAS and recovers the private key. In your set of constraints, this risk cannot be avoided because your NAS needs to know all the information needed to perform a connection, and there is always a way this information can get stolen.
You can however mitigate this risk. Here are a few ideas :
– make your NAS as secure as possible, check the file permissions of the private key, avoid opening it to the outside
– create a dedicated user on the server with permissions restricted to only what is needed by your nas, and associate the key to this user, so that even if the key is stolen the damage won’t spread too far
– your NAS is probably fixed and hopefully on a network with a static IP address, so you can configure the server to restrict the use of this key to your IP address
Foaly
Hey Foaly, yes that basically describes my situation! Thanks for the tips on the additional security steps, I will definitely look in to that!
Thanks again,
Raymond
I followed this guide up to the chmod of the .ssh folder and authorized_keys file. However my server (Unraid) is still asking for a password when I try to ssh to my Synology with the backup account. I verified that everything was done exactly according to this procedure..
The default Unraid user is ‘root’. But I named Synology account ‘fsync’. Could that be the issue? Do I have to create a user called ‘fsync’ on the Unraid server also and somehow run the ssh command from that account?
No, this shouldn’t be a problem as long as you specify the user you want to connect with : if you use “ssh fsync@<nas-ip>” instead of simply “ssh <nas-ip>”, the local user name won’t matter, as long as it is the user you used with ssh-copy-id (because this command will authorize only your current user, not your whole system).
Did ssh-copy-id worked correctly? Can you connect with the fsync account if you type the password?
If so, here are a few ideas to investigate. Connect to the Syno with the fsync account then :
– in the home folder, type “ls -al” and “ls -al .ssh” and check that the permissions of “.”, “.ssh” and “.ssh/authorized_keys” are correct according to what you specified with chmod
– open “.ssh/authorized_keys” and make sure it contains your key. Each key is a line in the file, starting with “ssh-rsa”, then the encoded key, then your host id (Unraid). Check that these look ok.
If everything looks as it should, try using ssh in verbose mode : “ssh -v fsync@nas-ip” and read through the log to see what authentication methods are used. If everything is setup correctly you should see these lines, among the rest :
Authenticating to <nas-ip> as ‘fsync’
Will attempt key: […] <– multiple lines like this, each with a local key that will be attempted to login, there should be at least the “id_rsa” that was generated with “ssh-keygen -t rsa”
Authentications that can continue: publickey,password
Next authentication method: publickey
Offering public key: […]
Server accepts key: […]
Authentication succeeded (publickey).
If you see “Next authentication method: password”, that means that none of your local keys was accepted, check again your keys (on both sides); maybe try to delete them and start again. If “publickey” is not even specified in the authentication methods, check your SSH configuration (again, on both sides).
Hope this will help you troubleshoot the issue!
Thanks for the extensive reply. I redid the entire thing and it still didn’t work. But then I connected with the verbose parameter, and I noticed that the key that I generated wasn’t even attempted!
Excerpts of the verbose log:
debug1: Will attempt key: /root/.ssh/id_rsa
debug1: Will attempt key: /root/.ssh/id_dsa
debug1: Will attempt key: /root/.ssh/id_ecdsa
debug1: Will attempt key: /root/.ssh/id_ed25519
debug1: Will attempt key: /root/.ssh/id_xmss
debug1: Next authentication method: publickey
debug1: Trying private key: /root/.ssh/id_rsa
debug1: Trying private key: /root/.ssh/id_dsa
debug1: Trying private key: /root/.ssh/id_ecdsa
debug1: Trying private key: /root/.ssh/id_ed25519
debug1: Trying private key: /root/.ssh/id_xmss
I think what I did wrong was that during the ssh-keygen action, I provided a name, like so:
root@Crookie-NAS:~/.ssh# ssh-keygen -t rsa
Generating public/private rsa key pair.
Enter file in which to save the key (/root/.ssh/id_rsa): unraidkey
Enter passphrase (empty for no passphrase):
Enter same passphrase again:
Your identification has been saved in unraidkey.
Your public key has been saved in unraidkey.pub.
So what I did was on the Unraid server I renamed this key to id_rsa and id_rsa.pub. Then I copied them over to the Synology again using ssh-copy-id, and now I can in fact ssh to the Synology from the Unraid server without having to enter a password.
I suspect this is not the neatest solution, but I’ve been at this for two days now so I’m just happy I can continue with the rest of your tutorial. 🙂
Thanks a lot for the help!
Ho, I see. Indeed, this would have generated keys with a non-standard name (probably not even in the .ssh folder) and neither ssh-copy-id nor ssh would use them. If you want to use another key file (I do not see a reason but you may have a special configuration), you can specify the key to send with ssh-copy-id using the -i flag, and then you would need to tell the ssh client to use this key as well using the IdentityFile directive in your client-side (Unraid) “ssh_config” config file (not “sshd_config”, which is the server config). However, make sure that your private key is secured by setting appropriate chmod settings.
Glad to see it works!
Appreciate the assistance very much. There is a lot of information to be found about using rsync with Unraid to another Unraid server, or synching from a Synology to an Unraid server (which for me is the wrong way around), or even synching from Unraid to a local Synology.
But your article is the only one (!) that I can find which properly explains how to set up rsync over SSH to an offsite Synology. So I just want to thank you again, and let you know your write-up and assistance is very much appreciated. Without it I would have never gotten it to work. 🙂
You’re welcome. If I believe the analytics of this site, according to which more than half the traffic is on this single article, you’re not the only one who has trouble with rsync on their Synology nas 😉
In fact, I’ve written it mainly to remember it myself, because when I wanted to set up my new NAS in replacement of an older one I had forgotten how I managed to do it the first time and I had to spend hours debugging it again… I’m glad to see it helps others as well. This should be documented by Synology themselves.
Hi,
I’ve got to step “uncomment the lines PubkeyAuthentication yes and AuthorizedKeysFile .ssh/authorized_keys (make sure not to change anything else, otherwise you could lock yourself out of SSH)”
I uncomment both lines and saved it wit “:w”
Then I restarted the SHH Service,and now I’m always getting “Network Error: Connection Refused” if I want to connect via Putty.
Checked the uncommend Lines probably 5 times.Did I just lcoked myself out , or is there a way to recover from this step.
Best Regards
Hi,
You can try enabling the telnet service (the checkbox just above the SSH service). Telnet is similar to SSH except that the connection is not secure (not encrypted), which is why it is usually not recommended to use it, but it should give you temporary access to a command line where you can go back to /etc/ssh/ssd_config to check your config. I believe Putty is compatible with Telnet.
If the content of the file looks correct, try commenting back the two lines, restarting the service, and see if it works : if yes, that means the problem is with these lines, maybe there is a problem with .ssh/authorized_keys; otherwise, there may be a problem elsewhere in the config file, maybe you appended a character by mistake somewhere else and didn’t notice and that causes a parser error.
You can also check the logs in case there are clues as to why sshd doesn’t accept connections (for example : “sudo tail -n 100 /var/log/auth.log”, maybe try /var/log/dmesg as well).
There may also be clues in the output of “synoservice –status”.
I hope this will help you find the issue!
I’ve had exactly the same issue, new DS220+, pristine, first time logged in in SSH. Your Telnet advise saved the day. I only changed the suggested lines so there is something more at hand.
Hi,
Thanks a lot for this guide. It was really useful!
But there is something I do not understand… do you know why we need to *restrict* the permisions on ‘~/.ssh/authorized_keys’ for this to work? Default Synology is 777 for everything… I would have expected this way rsync would have less trouble to work.
Hi,
This is for security purposes : you don’t want a user to be able to add or modify another user’s keys because that could lead to privilege escalation. I don’t remember exactly the details but I believe that the SSH server considers this to be so important that it won’t even consider the authorized_keys file if it is not sufficiently restricted (because the keys inside cannot be trusted), and that’s why the connection doesn’t work.
Yeah… makes sense… thanks for the quick reply.
It is so sad that Synology does not use UNIX permissions properly.
I am used to mounting my Synology’s user home using SMB and this more restrictive permissions break that.
Hi,
really apreciate Your well written How To. I’m trying to get rsync working again after we had to change to a new server. We had everything running and fine, but actually we alsways end up with an ‘Host key verification failed.’ This appeared first when we tried to copy the public key to the Synology:
ssh-copy-id backup@[nas-ip].
So we copied the public key manually to the Syno, renamed the file to authorized_keys and moved it to ~/.ssh/. Still the ‘Host key verification failed.’ persists. We did:
ssh-keygen -R [nas-ip]
to ‘clean’ the known_hosts file.
We’ve tried already a lot of things (removing known_hosts, authorized-keys), but we end up always with ‘Host key verification failed.’
Just trying to ssh to the server in verbose mode shows, that
…
– the connection is established,
…
– debug1: identity file /root/.ssh/id_rsa type 0 is recognized,
… after autentication to [nas-ip] as ‘USERNAME’
… and a few lines the connection ends with
debug1: read_passphrase: can’t open /dev/tty: No such device or address
Host key verification failed.
We can access the Synology trough ssh from terminal on our Macbook with the same credentials without any issues.
Hi Georges,
Just to be sure I understood your setup correctly : you have a Syno NAS that a distant server uses as a backup target; the NAS hasn’t changed, but the server has, and you want to configure the backup on the new server. Is that correct?
I believe that the “Host key verification failed” error is generated by the server’s SSH client : it means that it (the client) detected that the host you are trying to connect to is known, so it checks that its fingerprint (its key, that is sent by the SSH server on the host) matches the one stored locally in the known_host file. So if the error first appeared when you tried to use ssh-copy-id, it may mean that there was already a signature in the known_hosts.
Maybe try everything from the beginning : on your server, do the following :
1/ backup your .ssh directory ( cp -R ~/.ssh ~/.ssh.bak ) and empty it ( rm ~/.ssh/* )
2/ generate new RSA keys ( ssh-keygen -t rsa )
3/ make sure you are able to connect to the NAS via SSH with a password ( ssh backup@[nas-ip] ) -> you should be prompted with the Host key and asked to confirm it because it is new
4/ if it works, install your public key ( ssh-copy-id backup@[nas-ip] )
5/ follow the rest of the guide
If you still have “Host key verification failed” at step 3, it may mean that the server is not able to prompt you the confirmation message (which may be the meaning of “can’t open /dev/tty: No such device or address”), and therefore rejects the key by default. In this case, try disabling the check :
ssh -o StrictHostKeyChecking=no backup@[nas-ip]
If now it works, confirm that the server’s key was automatically added to your known_hosts. If so, “ssh-copy-id” should now work as expected, and you should be able to continue the procedure.
Hi,
thanks for your quick answer.
You’re right the Syno NAS is used as backup target and hasn’t changed. We had to migrate to a new server from which we want to send backups (PG_dump for the databases and rsync for files).
We followed step 1-2 and also deleted the ~/.ssh/authorized_keys on the NAS.
When we try to ssh backup@[nas-ip] we still get the same behaviour (no prompt for a password)?
Here’s the entire answer when trying to ssh from the new server to the Syno NAS:
[user@map root]# ssh -v user@xxxxx /bin/bash
OpenSSH_7.6p1 Ubuntu-4ubuntu0.3, OpenSSL 1.0.2n 7 Dec 2017
debug1: Reading configuration data /etc/ssh/ssh_config
debug1: /etc/ssh/ssh_config line 18: Applying options for *
debug1: Connecting to xxxxx [88.xxx.xxx.xxx] port 22.
debug1: Connection established.
debug1: permanently_set_uid: 0/0
debug1: identity file /root/.ssh/id_rsa type 0
debug1: key_load_public: No such file or directory
debug1: identity file /root/.ssh/id_rsa-cert type -1
debug1: key_load_public: No such file or directory
debug1: identity file /root/.ssh/id_dsa type -1
debug1: key_load_public: No such file or directory
debug1: identity file /root/.ssh/id_dsa-cert type -1
debug1: key_load_public: No such file or directory
debug1: identity file /root/.ssh/id_ecdsa type -1
debug1: key_load_public: No such file or directory
debug1: identity file /root/.ssh/id_ecdsa-cert type -1
debug1: key_load_public: No such file or directory
debug1: identity file /root/.ssh/id_ed25519 type -1
debug1: key_load_public: No such file or directory
debug1: identity file /root/.ssh/id_ed25519-cert type -1
debug1: Local version string SSH-2.0-OpenSSH_7.6p1 Ubuntu-4ubuntu0.3
debug1: Remote protocol version 2.0, remote software version OpenSSH_7.4
debug1: match: OpenSSH_7.4 pat OpenSSH* compat 0x04000000
debug1: Authenticating to xxxxx:22 as ‘user’
debug1: SSH2_MSG_KEXINIT sent
debug1: SSH2_MSG_KEXINIT received
debug1: kex: algorithm: curve25519-sha256
debug1: kex: host key algorithm: ecdsa-sha2-nistp256
debug1: kex: server->client cipher: chacha20-poly1305@openssh.com MAC: compression: none
debug1: kex: client->server cipher: chacha20-poly1305@openssh.com MAC: compression: none
debug1: expecting SSH2_MSG_KEX_ECDH_REPLY
debug1: Server host key: ecdsa-sha2-nistp256 SHA256:xxxxxxxxxxxx…
debug1: read_passphrase: can’t open /dev/tty: No such device or address
Host key verification failed.
No idea what to do next.
Hi,
Have you tried with the StrictHostKeyChecking=no option (cf end of my answer)? If there is no prompt for a password or a host key confirmation I believe it might be the solution to your problem.
Hi, sorry, but I forgot to give it a try.
ssh -o StrictHostKeyChecking=no user@abc.myfritz.net
Pseudo-terminal will not be allocated because stdin is not a terminal.
Warning: Permanently added ‘abc.myfritz.net,88.xxx.xxx.xxx’ (ECDSA) to the list of known hosts.
Permission denied, please try again.
Permission denied, please try again.
user@abc.myfritz.net: Permission denied (publickey,password).
So still no chance to connect
Ok, I think we are on the right track : “Warning: Permanently added ‘xxxxx,88.xxx.xxx.xxx’ (ECDSA) to the list of known hosts.”. It appears that, for some reason, your SSH client cannot use your terminal in interactive mode : it was not able to ask you for a confirmation for the host key, so you forced it to accept it anyway with the option (you should see the key in know_hosts, make sure to keep it); and now, it can’t ask you for the password. How are you connected to your server to launch these commands? Is it a “normal” SSH connection or are you using some kind of web-based command line tool?
I’d say you have two options here :
– either manage to get an interactive shell on your server which will allow you to enter the password and follow the tutorial
– or install your auth keys by hand on the NAS (now that the Host key stuff is taken care of on the server side), after which there shouldn’t be a need for an interactive shell anymore and you should be fine.
OK, the really important question was if it’s a “normal” SSH connection. No. it wasn’t. I was using the build in web-based tool inside Webmin. I’ve read a lot of different problems that could occur, but I didn’t realize, that I just could ssh from my Macbook’s terminal to the server and send the ssh commands then to the NAS. I managed now both connections to the server and to the Syno NAS trough the terminal and worder o wonder, everything worked like expected. I finally can access the NAS from my server and user all the magic of Cron Jobs to do the rest. Thank You for the help. Might be worth using such an advise in Your tutorial for guys like me, wo do not realize the difference beetween this web-based tool that look like a terminal window, but has in some cases essential restrictions.
Nice article, thanks so much for taking the time to post this. I was stuck until I ran the chmod commands against the user setup to be the backup user, that sorted it for me 🙂
Thanks a lot for the chmod trick!
I have set up SSH connection to my Synology DS1618+ as found in the above tutorial. When connecting (I am using MobaXterm client) to my disk station with SSH key authentication enabled, and I disable PasswordAuthentication in /etc/ssh/sshd_config file, I am not able to access the device at all. It says “Server refused our key”. Then I need to allow Telnet, re-enable PasswordAuthentication, and I can logon again. However the message “Server refused our key” is still there before terminal window opens. I just want to have SSH key authentication enabled only, password enabled access is inacceptable duo to security reasons. What am I doing wrong? Could you point me to where shall I look for to make SSH authentication with keys working as wanted? Many thanks in advance for your nice support.
Hi Joe,
In order to understand better why the server refuse the key, try enabling some some of verbose output in your SSH software (I’ve never used MobaXterm so I don’t know how precisely you can do it). This should give you detailed information of the negotiation between the client and the server, just as in the discussion with Georges above. If MobaXterm doesn’t offer this feature, maybe try finding a Linux computer or VM and try “ssh -v”, or maybe Putty on Windows has a verbose mode as well. Then try comparing with the extracts from George above and see if something comes up. Copy paste the output here if you need help understanding it.
Best,
Thanks foaly. I will definitely do what you suggest. However, if I am not wrong, SSH with key authentication had worked correctly in the past. I am not sure, unfortunately. It must have been some months ago, maybe a year or so when I was messing around with it. Then in the far past I disabled the SSH access after I got acquainted with it. At that time I did not need it. Now I would like to have it working for rsync to run smoothly. In the meantime 2 or 3 upgrades of the DMS were installed. My suspicion is this kind of update of the system. Might there be a bug in the newest version of DMS? If so, that’s some kind of user misguidance. My version is 6.2.3-25426 Update2 now. What’s your opinion?
I don’t think there is a bug in the NAS’s OS, I’m running the same DSM version 6.2.3-25426 Update 2.
Worked exactly as described. Now I can have rsync users who can’t ssh/shell but can rsync. Love it. Thanks.
Hey, thanks for the tutorial, works like a charm. 🙂
On thing though. I run ssh on my synology on a non standard port so ssh-copy-id returned a “Permission denied, please try again.” Adding the port to the command did the trick: “ssh-copy-id user@ip -p123456789”. Just leaving this here for others who may stumble upon this one.
Hi, have the same problem but on another view:
Connecting win10ws with synology nas by ssh works fine – keys are accepted -login without password…
Connting from one synology nas to another synology nas always ask for a password.
Tested ssh -v rsync@ip-address-of-nas, result:
debug1: Connecting to 1.2.3.4 [1.2.3.4] port 22.
debug1: Connection established.
debug1: identity file /var/services/homes/rsync/.ssh/id_rsa type 1
—
debug1: Enabling compatibility mode for protocol 2.0
debug1: Local version string SSH-2.0-OpenSSH_7.4
debug1: Remote protocol version 2.0, remote software version OpenSSH_7.4
debug1: match: OpenSSH_7.4 pat OpenSSH* compat 0x04000000
debug1: Authenticating to 1.2.3.4:22 as ‘rsync’
debug1: SSH2_MSG_KEXINIT sent
debug1: SSH2_MSG_KEXINIT received
debug1: kex: algorithm: curve25519-sha256
debug1: kex: host key algorithm: ecdsa-sha2-nistp256
debug1: kex: server->client cipher: chacha20-poly1305@openssh.com MAC: compression: none
debug1: kex: client->server cipher: chacha20-poly1305@openssh.com MAC: compression: none
debug1: expecting SSH2_MSG_KEX_ECDH_REPLY
debug1: Server host key: ecdsa-sha2-nistp256
SHA256: abcde
debug1: Host ‘1.2.3.4’ is known and matches the ECDSA host key.
debug1: Found key in /var/services/homes/rsync/.ssh/known_hosts:1
debug1: rekey after 134217728 blocks
debug1: SSH2_MSG_NEWKEYS sent
debug1: expecting SSH2_MSG_NEWKEYS
debug1: SSH2_MSG_NEWKEYS received
debug1: rekey after 134217728 blocks
debug1: SSH2_MSG_EXT_INFO received
debug1: kex_input_ext_info: server-sig-algs=
debug1: SSH2_MSG_SERVICE_ACCEPT received
debug1: Authentications that can continue: publickey,password
debug1: Next authentication method: publickey
debug1: Offering RSA public key: /var/services/homes/rsync/.ssh/id_rsa
debug1: Authentications that can continue: publickey,password
debug1: Trying private key: /var/services/homes/rsync/.ssh/id_dsa
debug1: Trying private key: /var/services/homes/rsync/.ssh/id_ecdsa
debug1: Trying private key: /var/services/homes/rsync/.ssh/id_ed25519
debug1: Next authentication method: password
On one site the system is “Offering RSA public key” on the other site the “next authentication method iis password – why ???
Hi Andreas,
Let’s say that you are logged in as user ‘rsync’ on NAS1, and you are trying to ssh as user ‘rsync’ into NAS2. Can you confirm that the public key for ‘rsync’ on NAS1 (the content of the file [NAS1]/var/services/homes/rsync/.ssh/id_rsa.pub) is present in the authorized keys of the user ‘rsync’ on NAS2 (i.e. in the file [NAS2]/var/services/homes/rsync/.ssh/authorized_keys) ?
Hi, confirm:
nas01: /volume1/homes/rsync/.ssh: id_rsa & id_rsa.pub – key inside ist marked as rsync@nas01
nas02: /volume1/homes/rsync/.ssh: id_rsa & id_rsa_pub – key inside is marked as rsync@nas02
authorized_keys: key inside is marked as rsync@nas01
And on both NAS’s, you are able to connect successfully with key authentification from a third machine (“win10ws” in your first post) ?
It seems like the ssh server (NAS2) is not reading the keys in /var/services/homes/rsync/.ssh/authorized_keys, because the debug from the client says “Offering RSA public key: /var/services/homes/rsync/.ssh/id_rsa”, which should be followed by “Server accepts key: /var/services/homes/rsync/.ssh/id_rsa”.
Can you double-check the permissions of the files? (see the chmod commands below “this is important” in the article)
Also, can you try the following :
– connect to any user on NAS2 from a third computer, then ‘sudo su’ to get root access
– try to connect to NAS2 from NAS1, it should ask you for a password, cancel connection
– from the connected user as root, look at the end of /var/log/auth.log to see if you have any hint why the ssh server doesn’t accept your key
Hi again…have some time for private pruposes…
Just reset every settings made before. Added the new user “rsync” to the admin group, followed your instructions, setting the permissions (see above) and exchange the rsa-key. It is running…thanks…Next Step build up an backup script…the script is running and controlled on nas01…running on the first start…perfect….now I tried to do the next step… wol the nas02, rsync files between nas01 and nas02, shutdown nas02…and the trouble starts…the user rsync is in the admin group…ssh rsync to nas01…script command (example): ping IP-of-NAS02 -c 2…operation not permitted…the script must run under the root user, but
with the root user the rsync is not running any longer…
Hi Andreas,
Indeed, I tried on my own NAS and ping doesn’t seem to be available for non-root users. I don’t know a workaround. Is that ping command necessary for your script? If so, and if running your script as root is not a security concern to you, you could redo the key exchange from the root user of nas01 to allow it access to nas02 (copying the keys from the rsync user to the root user should also work but generating and exchanging new keys specific to the root user would be cleaner).
Hello Foaly,
thanks for the great documentation.
In the first round i have created a key pair for my own user which I have copied to my NAS, whilst I did not change the file and folder permissions, all worked fine.
But – and here comes my question – the rsync user exists only on the NAS and not on the servers I would like to back up. The rsyc command is obviously able to use the rsync account and works with password authentication very well.
What I would like to achieve is, that to be able to authenticate the rsync user during the rsync task even if the user does not exist on the source machine, only on the target machine (NAS).
Can you put me to the right direction – with a best practice – on how could I create a key pair
– for a user that exists only on the NAS (rsync server)
– on multiple machines to be rsync-ed (backed up) to the NAS
thanks in advance
regards
Marcell
Hello Marcell,
I think there is a confusion about the users that are used on the backed-up server and the NAS : you say “even if the user does not exist on the source machine”, but the users on the two machines will always be different (even if they may have the same name).
Let’s give them different names to clear things up. Let’s say you have a user named ‘backup’ on the NAS, and a user named ‘marcell’ on the server. Since users are local to a machine, their fully-qualified names would be backup@nas and marcell@server. If you want marcell@server to be able to rsync some files to backup@nas, you need to login by SSH with the user marcell on the server, then do the key generation and copy procedure as described in the article (the ‘ssh-keygen’ if you don’t already have keys, the ‘ssh-copy-id’, and so on). This will copy the key from marcell@server’s id_rsa.pub file into backup@nas’s authorized_keys file. After this step, marcell@server should be able to SSH into backup@nas without using a password, and therefore rsync should work as well.
If you have multiple servers to backup to the NAS, just perform this for each server (marcell@server, someotheruser@someotherserver, etc). backup@nas can have as many keys as required in its authorized_keys file. Do note that for it to work, the user that you use on the server (marcell@server in the paragraph above) must be the one that will perform the rsync commands afterwards (from some cron task for example), because the key that is copied is linked to marcell@server, not every user on ‘server’ (not even root).
Let me know if that solved your problem or if I misunderstood the issue.
Regards
Foaly
Hi Foaly,
thanks a lot for the quick response, this info was the missing bit to me.
You helped me to put the things to the right place. I was stuck somehow with user name couples and did not understand the concept in 100%.
I did it accordingly and now it works like charm. (however is still do not get why does it work without the chmod part, but happy about that too)
Thanks again for your help and very quick response
Have a nice evening
Marcell
Glad to hear you got it working !
It works! Thank you so much for writing this!
My issue is that I get an error saying folders don’t exist and it tries to write to homes/user instead of the share I have created for backup.
My error is as follows:
rsync: mkdir “/volume1/homes/rsyncuser/ShareName/DATA” failed: No such file or directory (2)
rsync error: error in file IO (code 11) at main.c(689) [Receiver=3.1.2]
I can login fine without a password so the ssh key seems to work. Syntax for rsync is:
rsync -apmvzx –delete –delete-excluded –partial –info=progress2 –log-file=rsync.log –exclude=”.[\!.]*” /Volumes/LocalDrive/Data/ ehall@10.0.1.128:ShareName/Data/
Correction to be consistent with the error:
rsync -apmvzx –delete –delete-excluded –partial –info=progress2 –log-file=rsync.log –exclude=”.[\!.]*” /Volumes/LocalDrive/Data/ rsyncuser@10.0.1.128:ShareName/Data/
Hi Eric,
Does the directory /volume1/homes/rsyncuser/ShareName/Data (“Data” or “DATA”?) already exists on the NAS? When logged in on the NAS with the user rsyncuser, can you cd and ls into this directory, and does it already contain some files?
There is a “gotcha” with rsync, the trailing “/” is important at the end of the source parameter, see here for instance : http://qdosmsq.dunbar-it.co.uk/blog/2013/02/rsync-to-slash-or-not-to-slash/, make sure it is not the cause of your issue.
But, do I want the shares to live in the user’s home directory?
You specified a relative path in the rsync command (“rsyncuser@10.0.1.128:ShareName/Data/”), which by default will put it relative to this user’s home directory.
If you want to put the files somewhere else, specify an absolute path, such as “rsyncuser@10.0.1.128:/volume1/ShareName/Data/”. The fact that the path starts with a “/” makes it absolute.
That was it! I had a relative path. Now, it seems that changing from a single “:” to a “::” between the host and folder location was the key to getting the key to work. Why is that?
It’s another gotcha of rsync : with one colon it will transport the files over SSH, but with two colons it will use a specific rsync daemon running on the remote. You can find more information in rsync’s man page (here for instance : https://linux.die.net/man/1/rsync), the two formats are described in the Synopsis at the beginning.
However, I don’t know why you needed to use this, it should work perfectly over SSH (with a single colon) if your keys are installed correctly. I’ve never used the rsync daemon so I’m not sure about the pros and cons of each method.
How would you rsync to the synology without using the deamon? Also, I had a question about getting SSL to work just on the internal lan. Not really related to this discussion. Can I start a new thread somewhere? Finally, how do I get notified of replies?
You can run rsync without the daemon, directly over SSH. In this mode, files are transferred through the SSH channel. This is interesting for a few reasons, mainly it is easy to use because you usually already have SSH configured, and it ensures the same strong authentication and encryption that SSH offers (as well as the key exchange feature described in this article). I think the only thing needed is to have the rsync client installed on the remote. In this case, use a single colon in your rsync command.
SSL is not my area of expertise. You should try to open a thread on a forum dedicated to Synology products.
Hi,
I succeeded in connecting to the nas with ssh. Thank you for that.
rsync will not succeed. I get the message Permission denied.
My rsync line is:
rsync -rlptgoDv -e “ssh -p 8022” –delete ~/AAA myname@nasIP:/volume1/rsync-myname
The last verbose text before the error is:
debug1: Sending command: rsync –server -vlogDtpre.iLsfxC –delete . /volume1/rsync-myname
NAS-user myname has read and write rights on the shared folder rsync-myname.
The shared folder is owned by root
I found a solution on Synology community
DSM5.1 => rsync: Permission denied
jkoler wrote: ”
However, a simpler workaround I found is to give the explicit path to the rsync binary when you invoke rsync on the client (i.e add –rsync-path=/usr/syno/bin/rsync to the rsync command line on the client).”
For me it solved the problem.
I think for safety reasons synology nas prevents start-up of programs except for some. But to use them you have to know the exact path to the program. To know this exact path in your synology nas you can use “which rsync” within the nas. You have to provide the nas of this information.
Hi Marc, thanks for posting the answer to this problem for other users ! I’m not sure why specifying –rsync-path would be necessary but I’ll keep it in mind if someone else has “Permission denied” issues.
You really should update this information. Most of it is gold, but things have changed since it was written. The command you use to restart services has had the name changed. Either that or delete the whole thing.
Excellent article. Followed it step by step and it worked. The only things I had to figure out in DSM 7 are explained in the comments:
You have to enable User Home Service so that the ssh-copy-id command can copy the key on the NAS ‘backup’ home folder.
Control Panel > User > tab Advanced > section User Home at the bottom > Enable user home service
The restart command doesn’t work so just disable and re-enable the service:
Control Panel > Terminal & SNMP > Uncheck Enable SSH > Apply. Check back Enable SSH Service > Apply
Many thanks!
Glad you got it to work, and thanks for the clarifications !
Thank you so much for that ! It saved me many hours !