I’ve been doing a lot of resin casting lately, and as usual, the needs of one project led to many sub-projects. This is one of them. Keep reading if you are interested in the story, or skip to the end if you only want to download the source files.
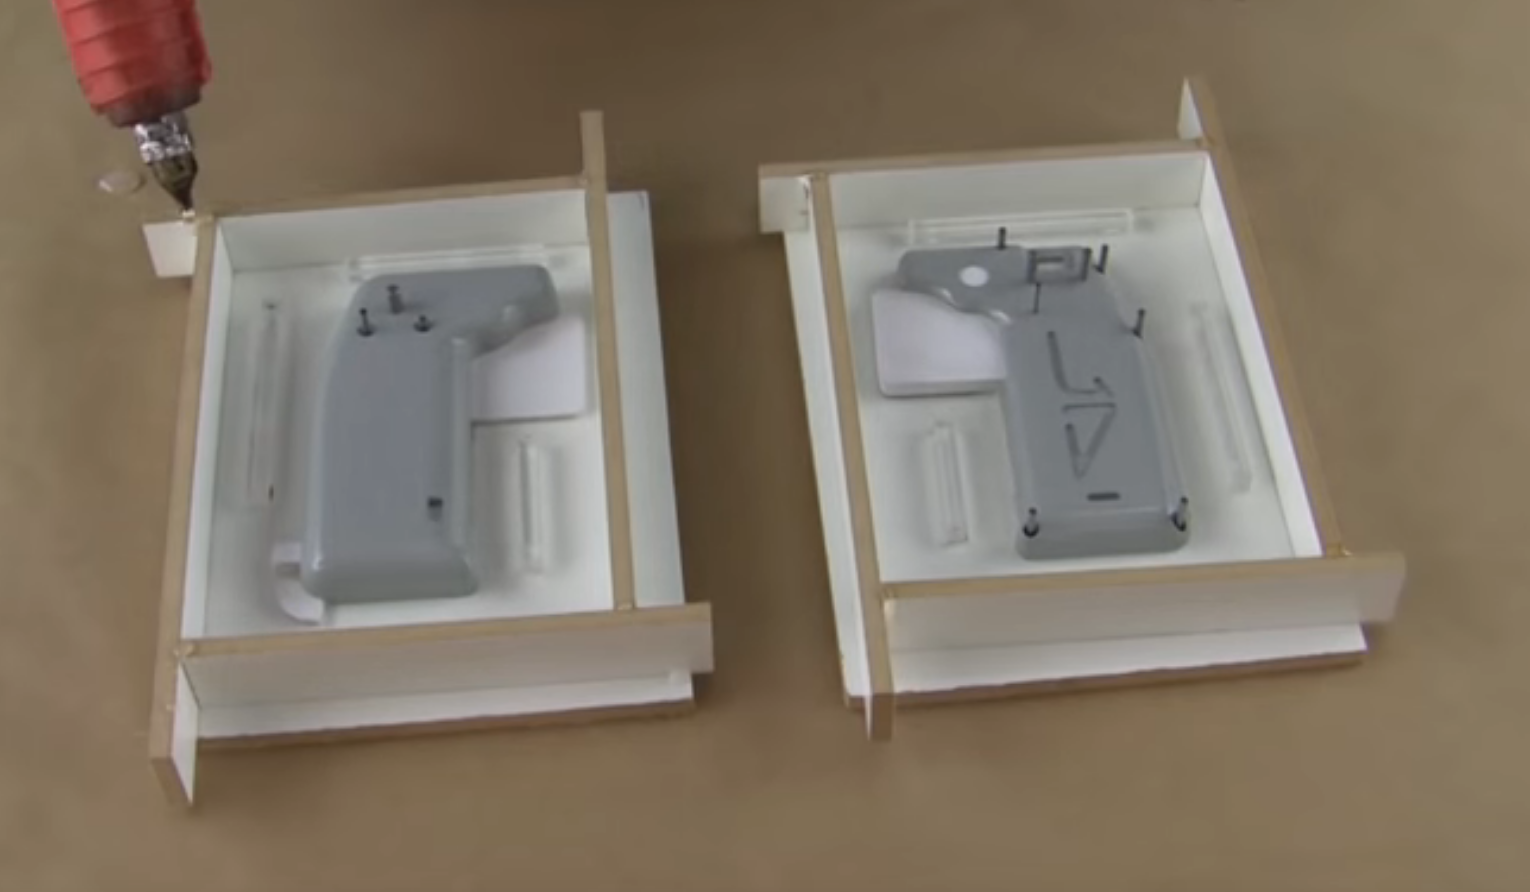
For those who are not familiar with mold making and resin casting, it usually involves using a master part, putting it in a box, pouring some silicone resin over it, and waiting for it to cure for a few hours to obtain a nice silicone mold. This mold can then be used to make more of the same part. You can see an example in the following introduction tutorial from Smooth-On :
I love mold-making and the possibilities it offers, but I quickly found out that making the box around the master is one of the less enjoyable part of the process. Most tutorials usually build a bespoke box out of wood planks screwed together, or acrylic boards hot-glued on another board, but I never liked any of these solutions : I don’t have a workshop to cut wood planks, and hot glue is too messy for my taste (I somehow always end up with strings of melted glue on my master, or worse, a leaky mold box).
Just like everyone always do nowadays, I turned to my 3D printer for a magical solution. A mold box can be as simple as a box with a bottom, 2 layers of filament for the walls, and an open top, and this is exactly what I started with.

While it works, there are a few problems with this solution, most importantly :
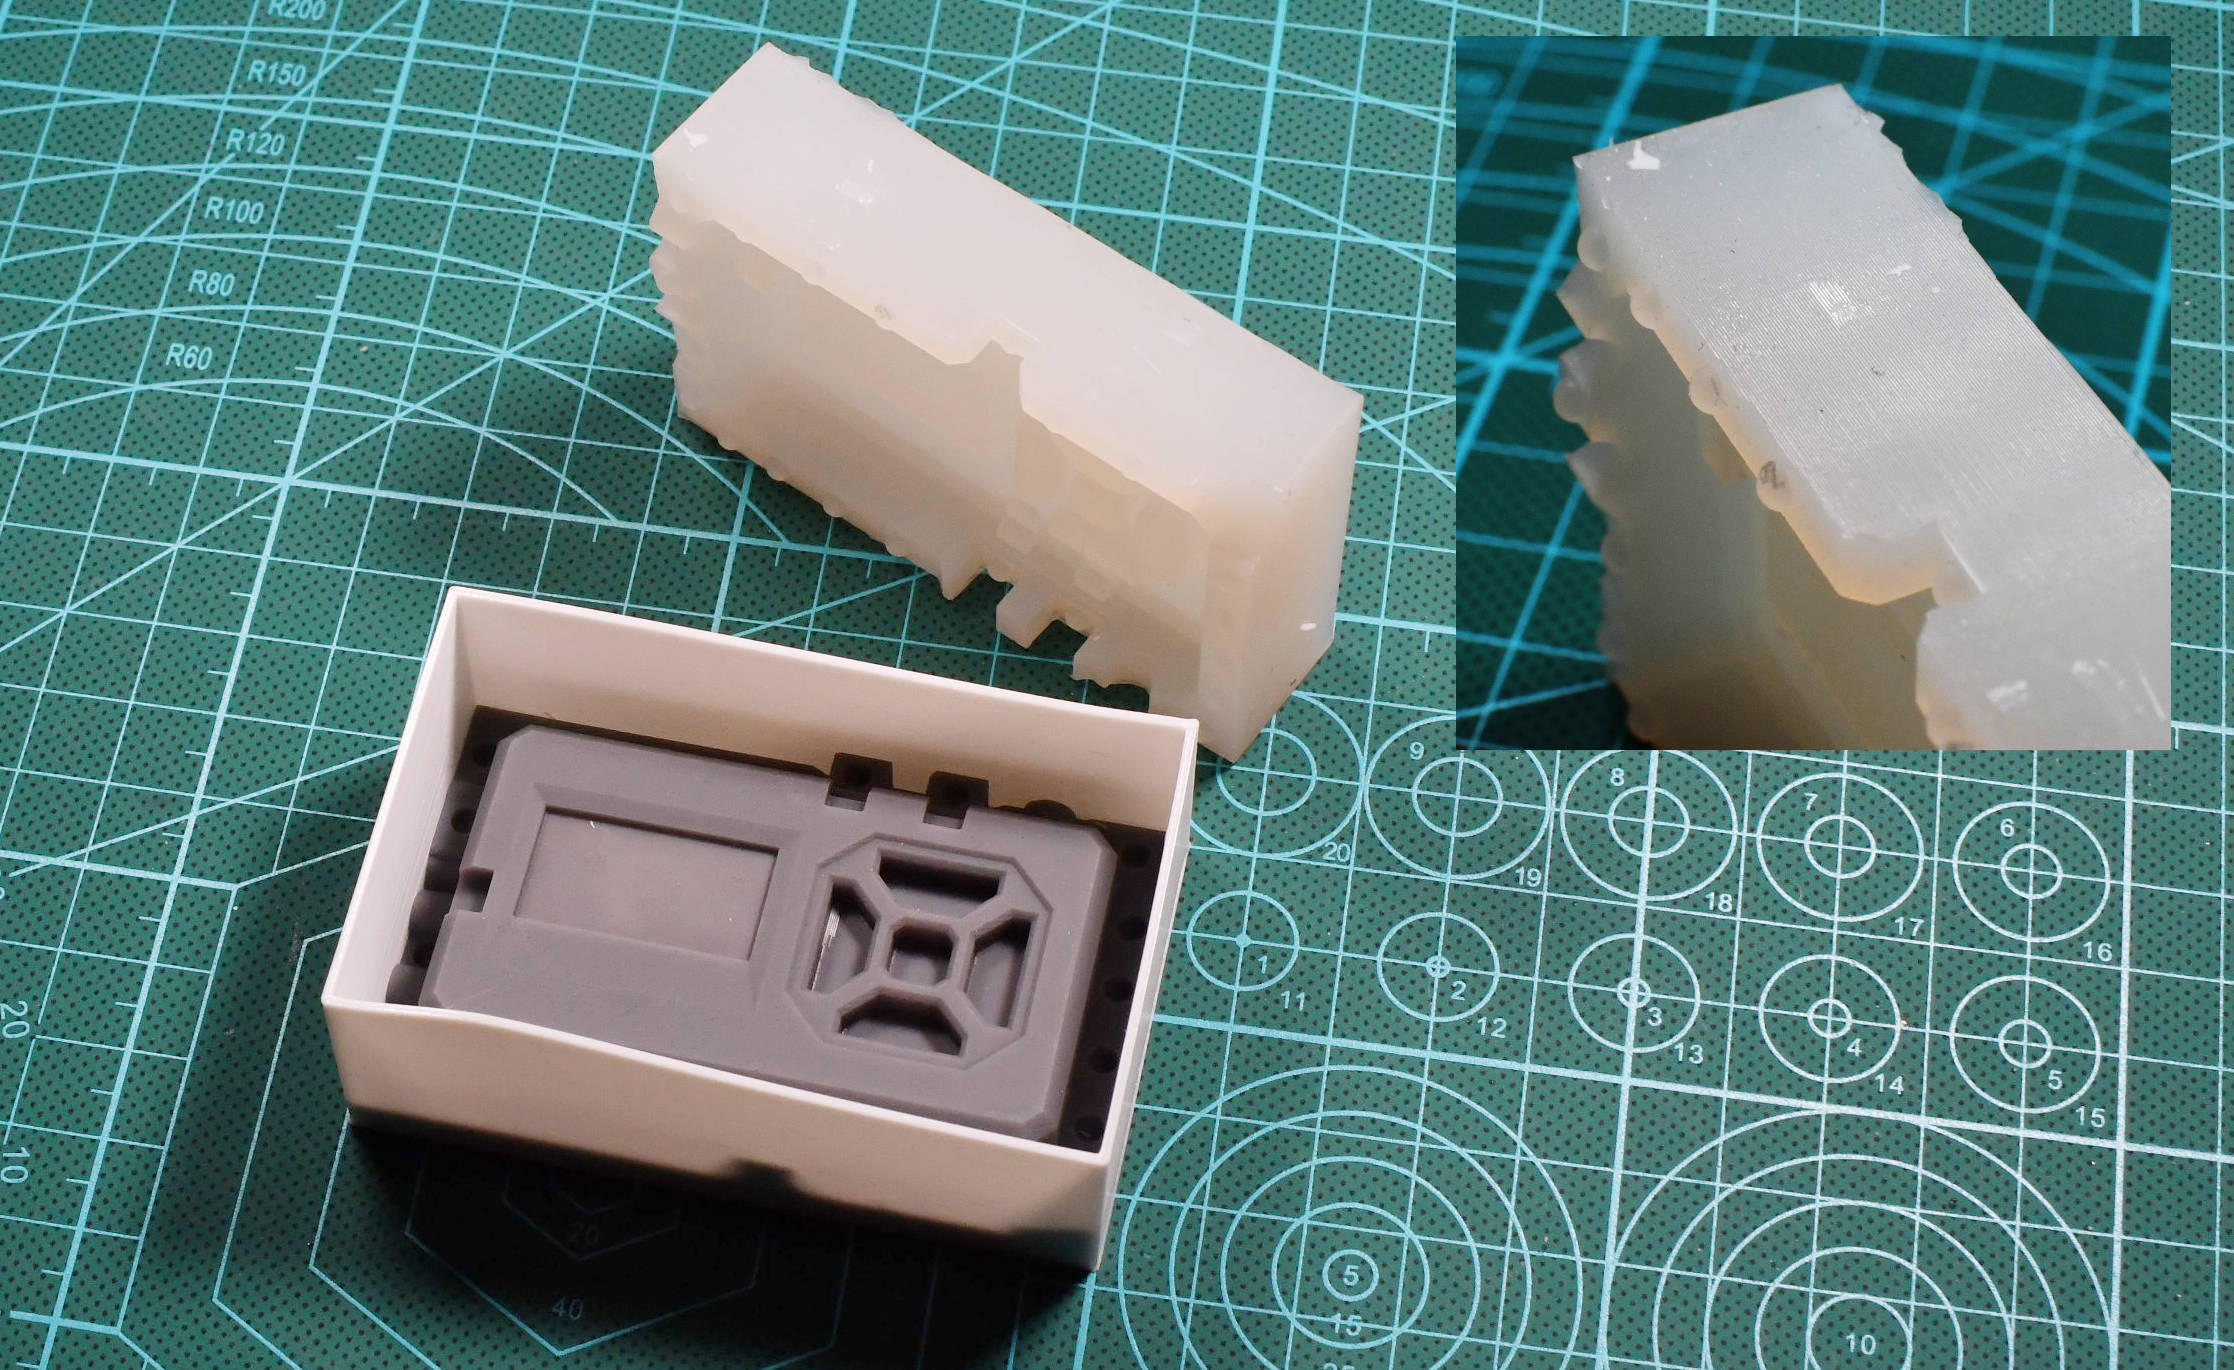
- because of the textured surface of the walls of the box (the printed layers) and the fact that the silicone flows into every tiny detail of every surface it touches, a mechanical lock occurs between them, which makes removing the brand new mold from its box a bit difficult ; sometimes the mold box even has to be sacrificed in the process
- this layered texture left on the sides of the mold is somewhat undesirable for a few different reasons
- having to design a box, start the 3D printer, and wait for an hour or two for it to finish, every time I want to make a mold, kind of kills the mood
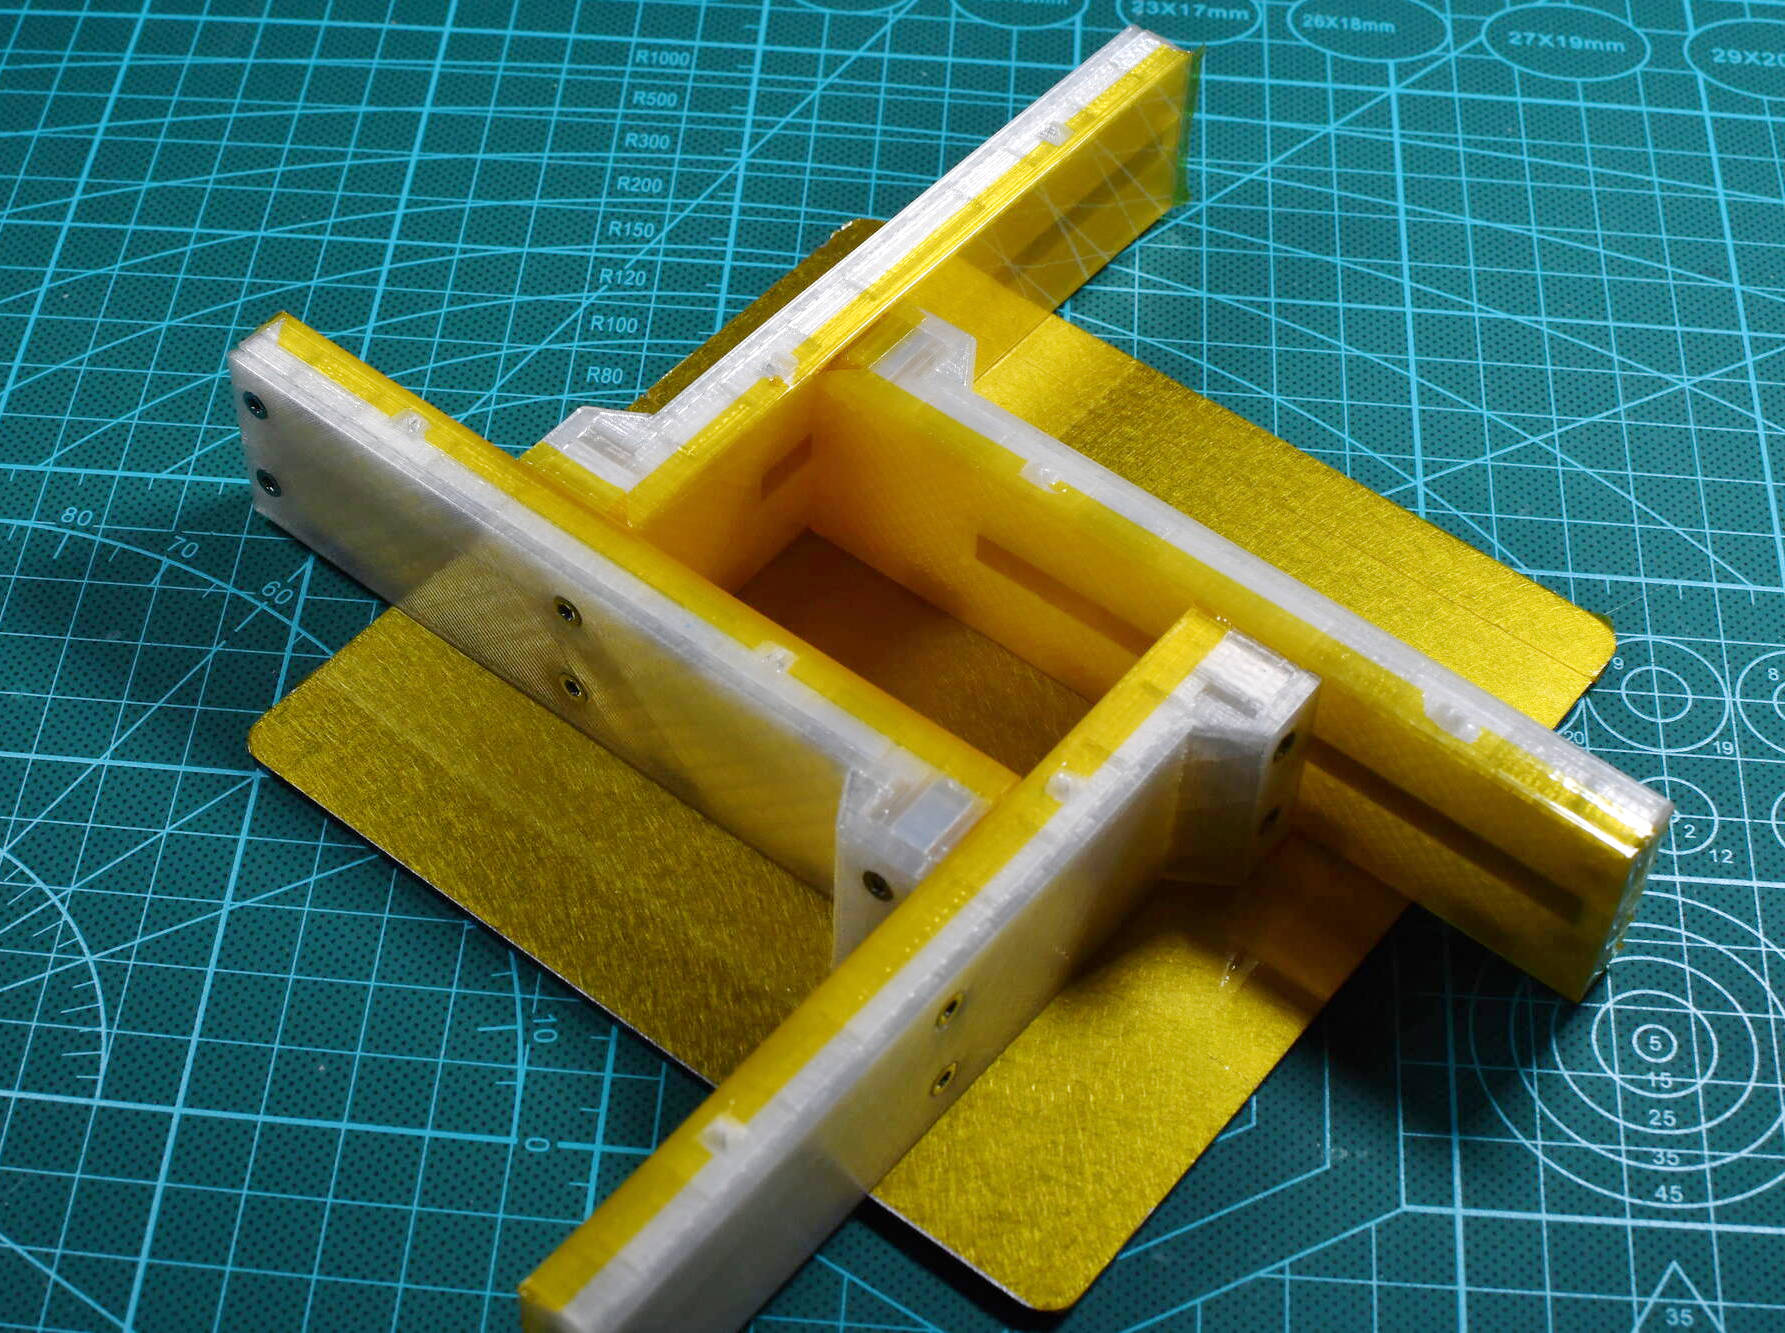
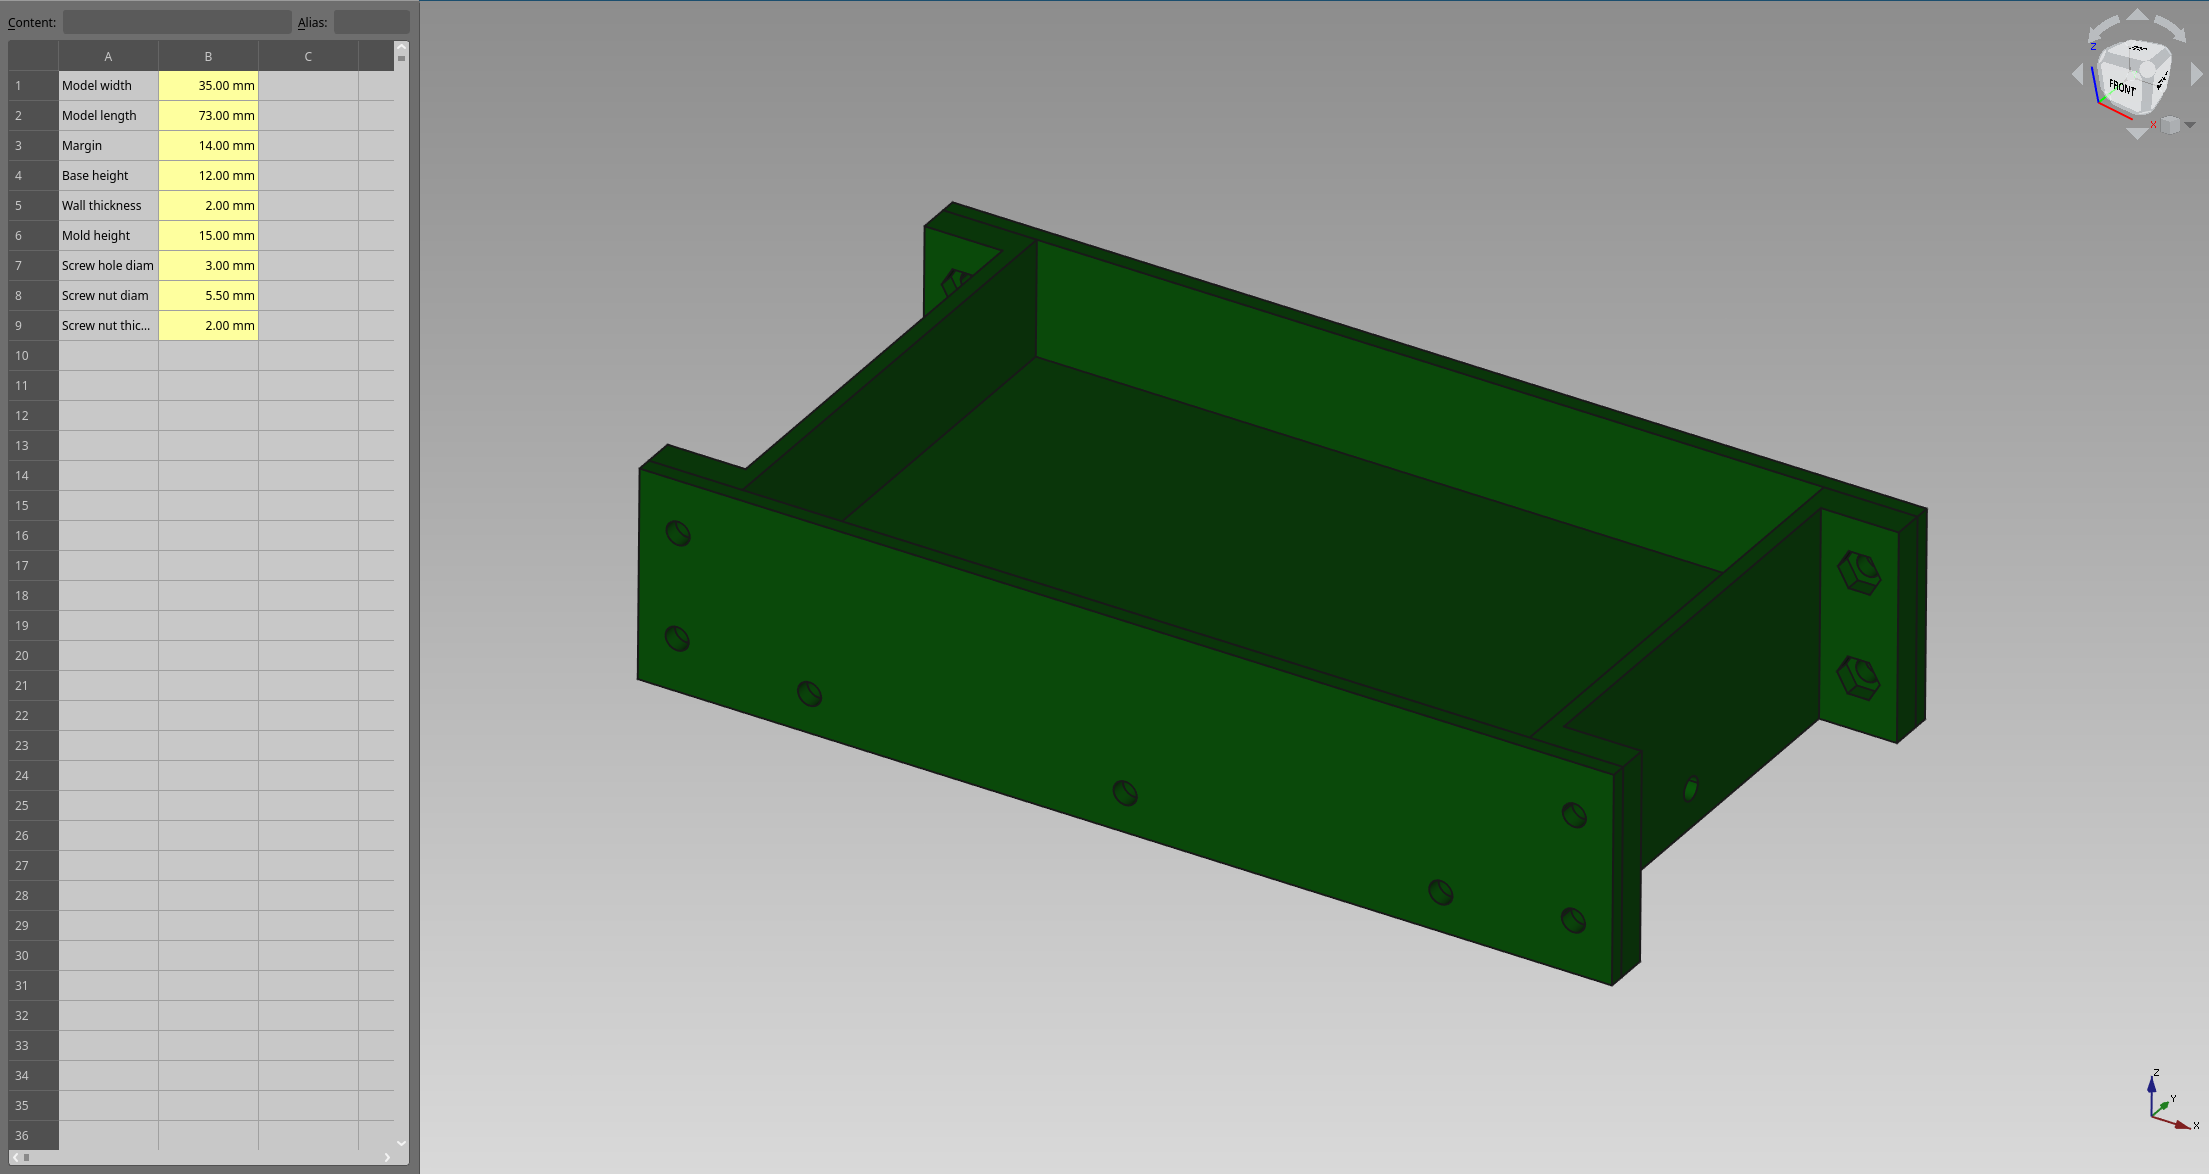
Solution #2 involved a more complex 3D-printed design in 5 parts : 4 walls and a bottom part, secured together with M2.5 screws and nuts. I made this design with FreeCAD using the Spreadsheet workbench to define the global dimensions, and equations that relied on these variables to compute the geometry. This allowed me to easily generate a box of any size. Since the box could be disassembled, it was now fully reusable. Moreover, the 5 parts were designed to be printed with their internal surface in contact with the printer’s glass bed, which produces a smooth surface for the silicone. For even more smoothness and easier cleaning, I covered every internal surface of the mold box with Kapton tape.
It solved most of the problems of the previous design, but there were still some key issues :
- the size of the box is fixed, which means either I had to print a new box for every size of mold (which takes a long time, and uses lots of plastic), or I had to use a larger box for multiple molds, which uses more silicone than necessary (and silicone isn’t cheap)
- assembling and disassembling this box with all these screws took some time, and I don’t like repetitive tasks
Back to the drawing board again.
I liked the idea of a modular box that uses 4 panels as walls placed in a sort of cross shape, like presented in the video below. This allows to have a standard size of wall that can be used to make a box of any size.
However, as I said, I don’t want to use hot glue. I couldn’t use screws either, because to make the size adaptable I would need long oblong holes on the sides, and obviously, the resin would leak. Securing the walls on the base plate would also have been an issue.
In a perfect timing, Eric Strebel over on Youtube published in the following days a video about a new mold box design which uses magnets instead of screws to make assembly and disassembly of the box easier :
Great idea ! Unfortunately, this box is of a fixed size, but I only needed to combine both ideas together to make it modular.
I made a new design in FreeCAD around the following key ideas :
- L-shaped walls, where the long side is in contact with the mold, and the short side is used to snap at a 90° angle to the adjacent wall
- as usual, customizable dimensions with spreadsheet variables
- rectangular flat magnets would be the best suited
- a “rail” of these magnets aligned with the same polarity could act as a single long magnet
- magnets on top and bottom of each wall would make it possible to assemble them vertically (in multiple layers), and build a box of greater height
- with the bottom-side magnets, a simple steel plate could be used as the base plate, and the walls would simply snap in place in any position required
I settled on these 10mm x 5.5mm x 2mm magnets from magnet-shop.com, which offered the best compromise of size, thickness, strength and price.
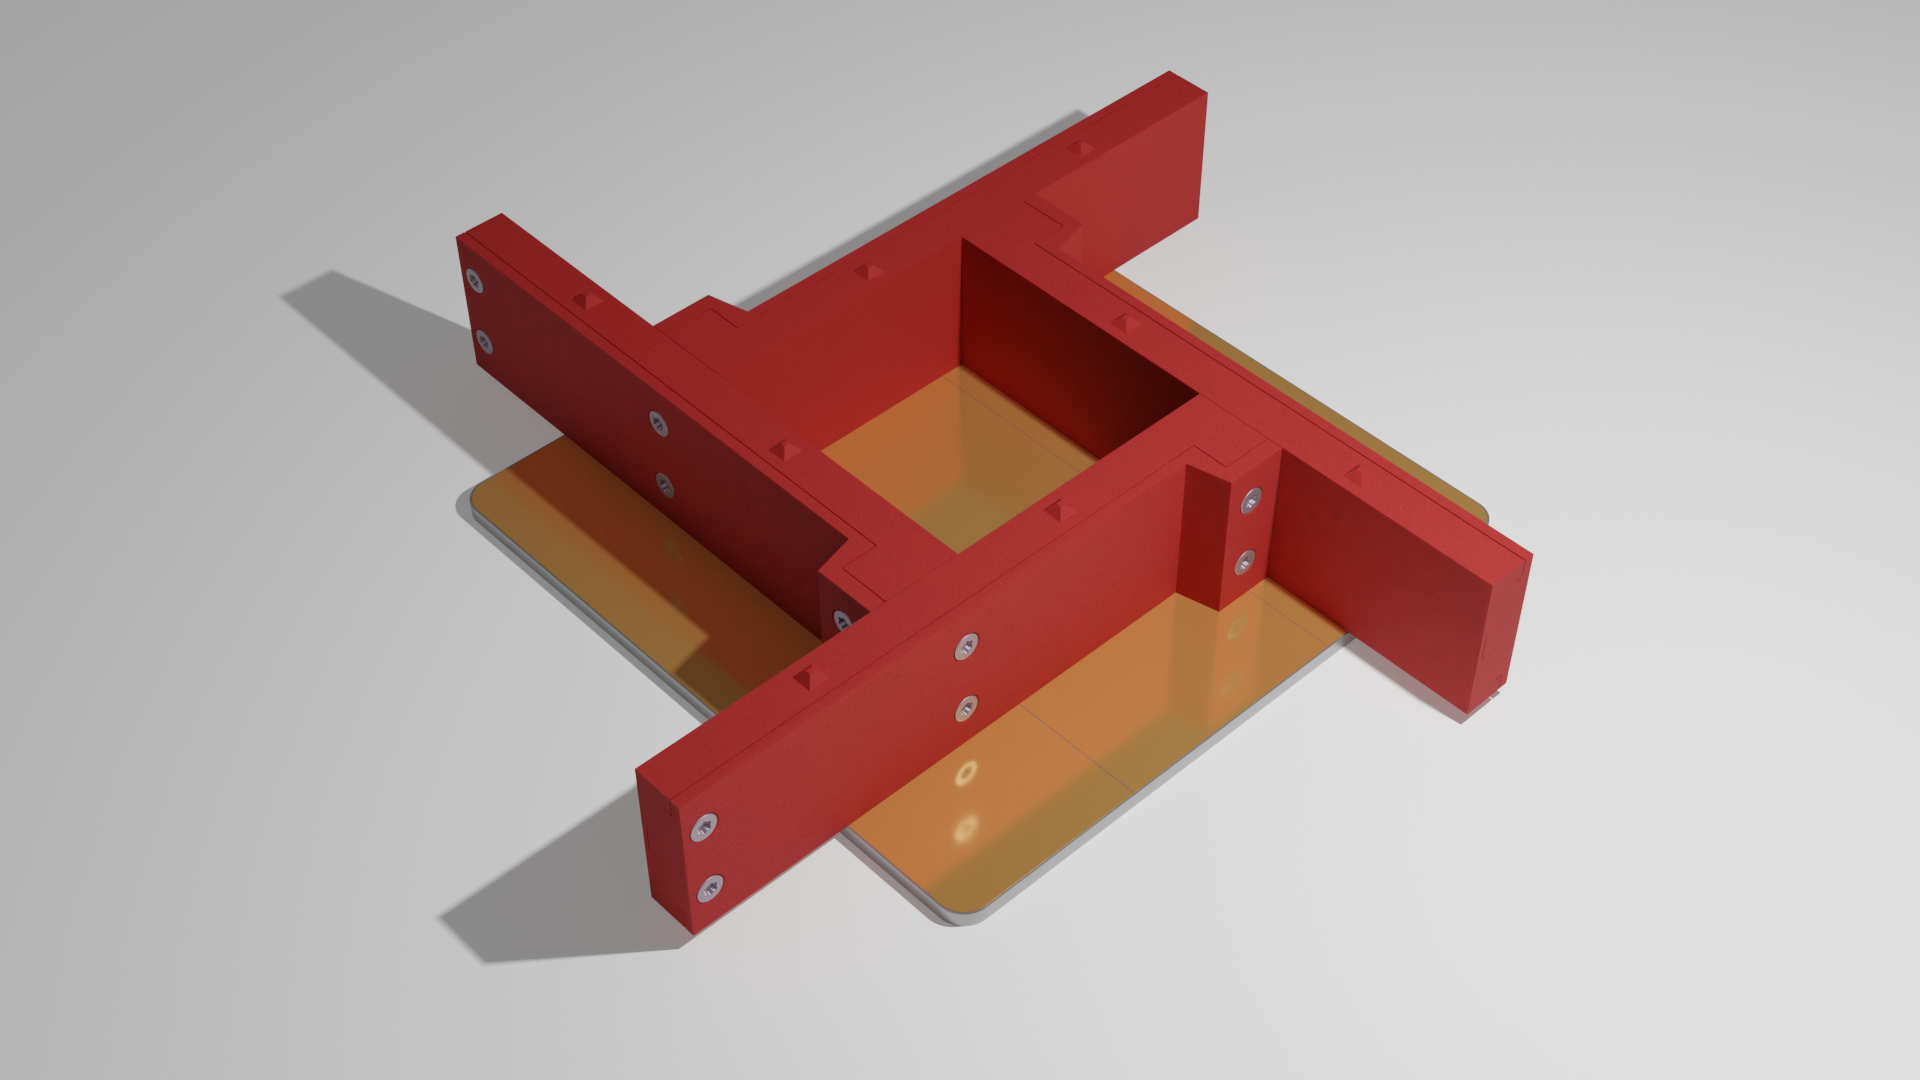
Here is the final design :
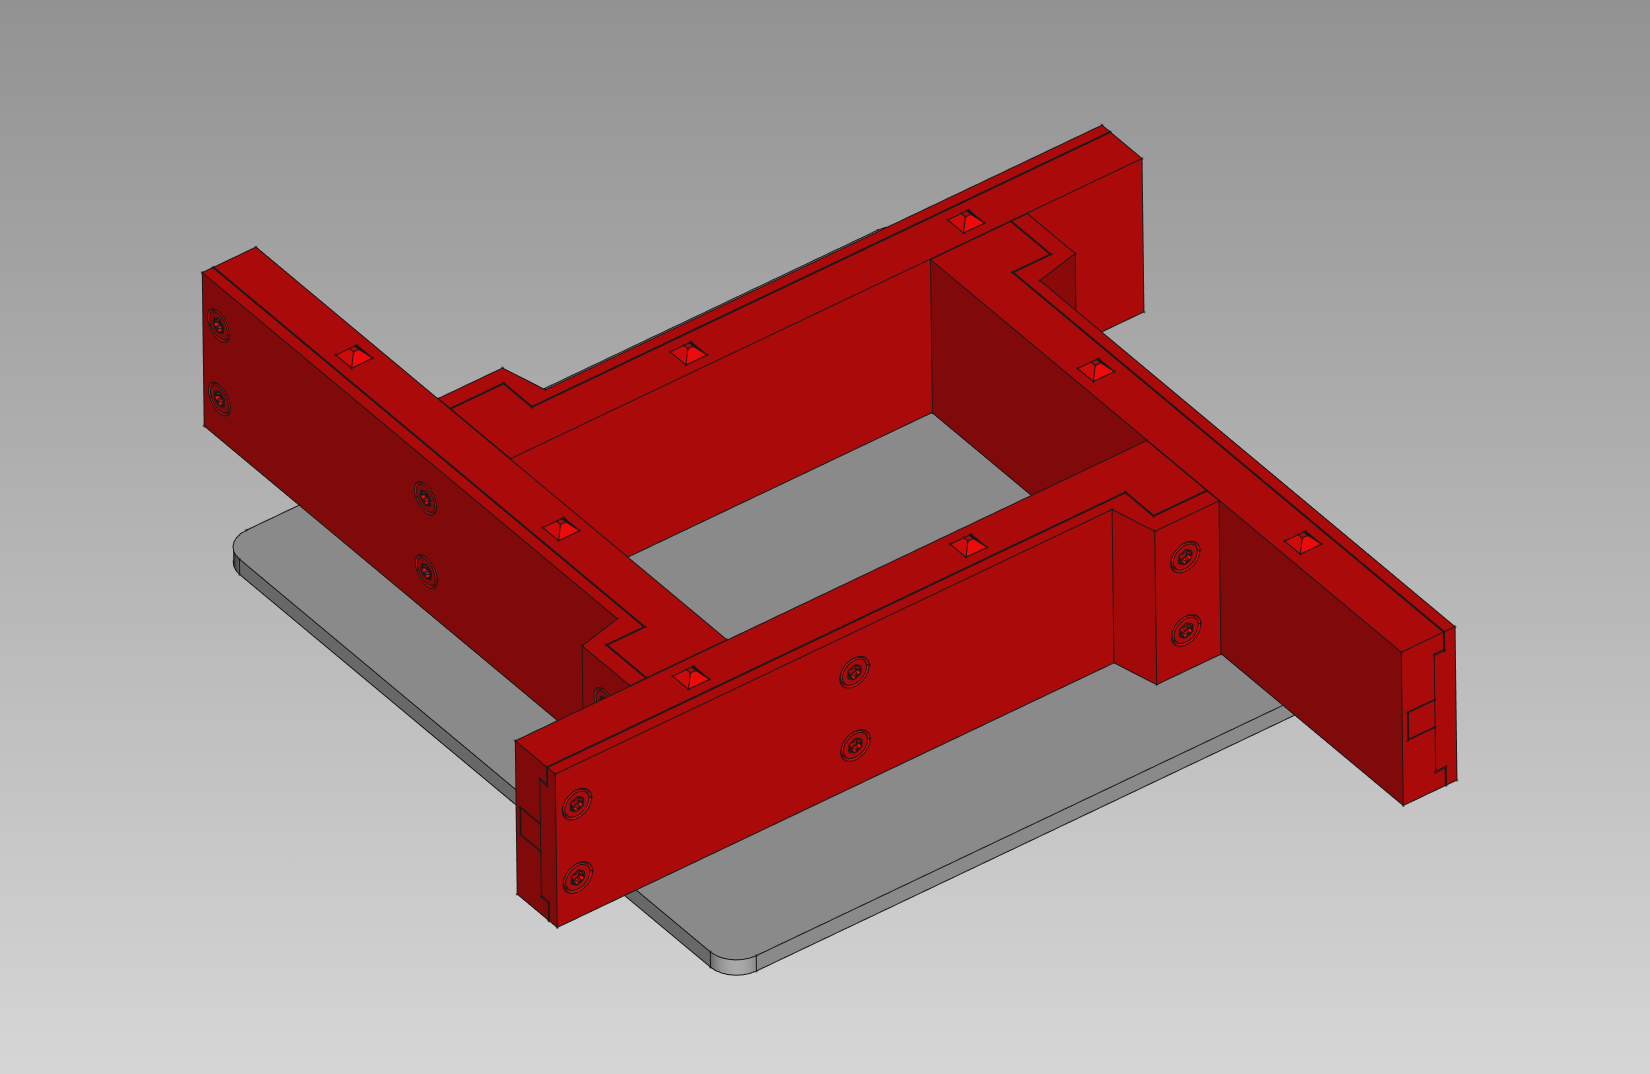
Let’s take a closer look at each wall. Here is how the magnets are organized :
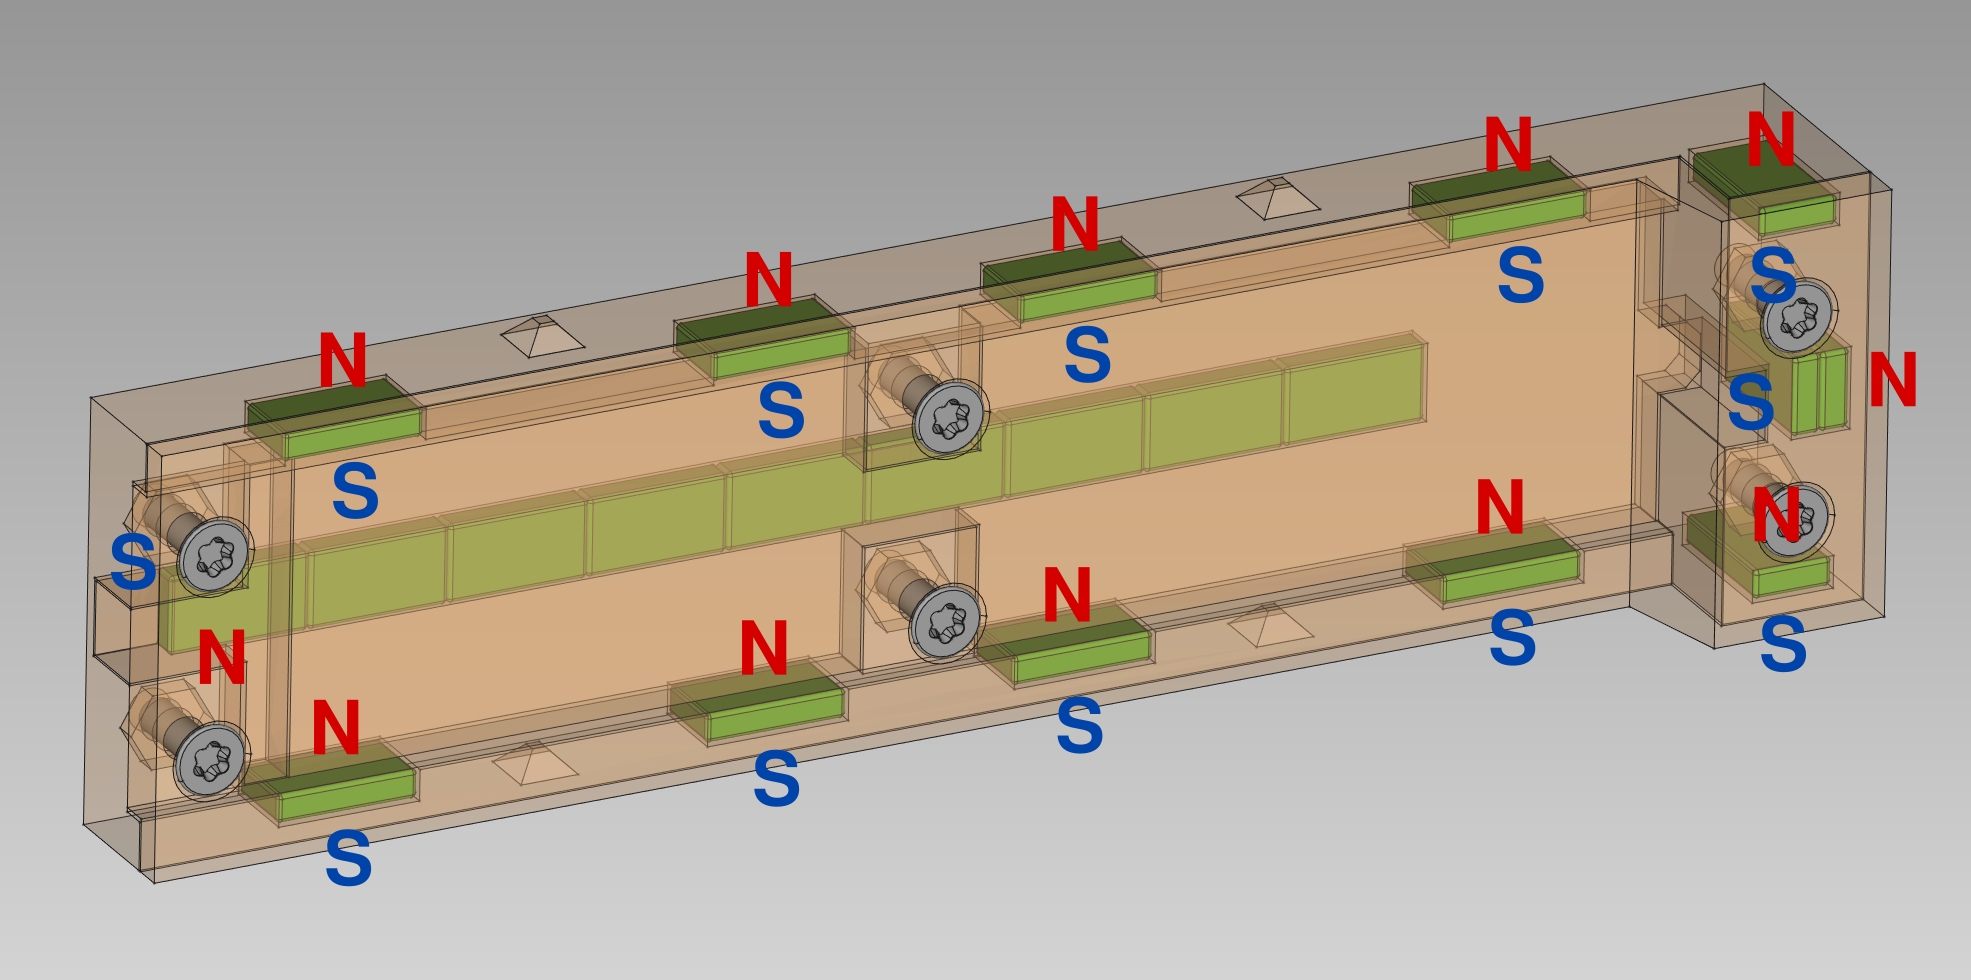
The main rail contains 9 magnets, which means the box can be set to any rectangular size between 2cm x 2cm and 10cm x 10cm. Each wall is 3cm high, but multiple walls can be piled up as high as necessary to obtain any height required.
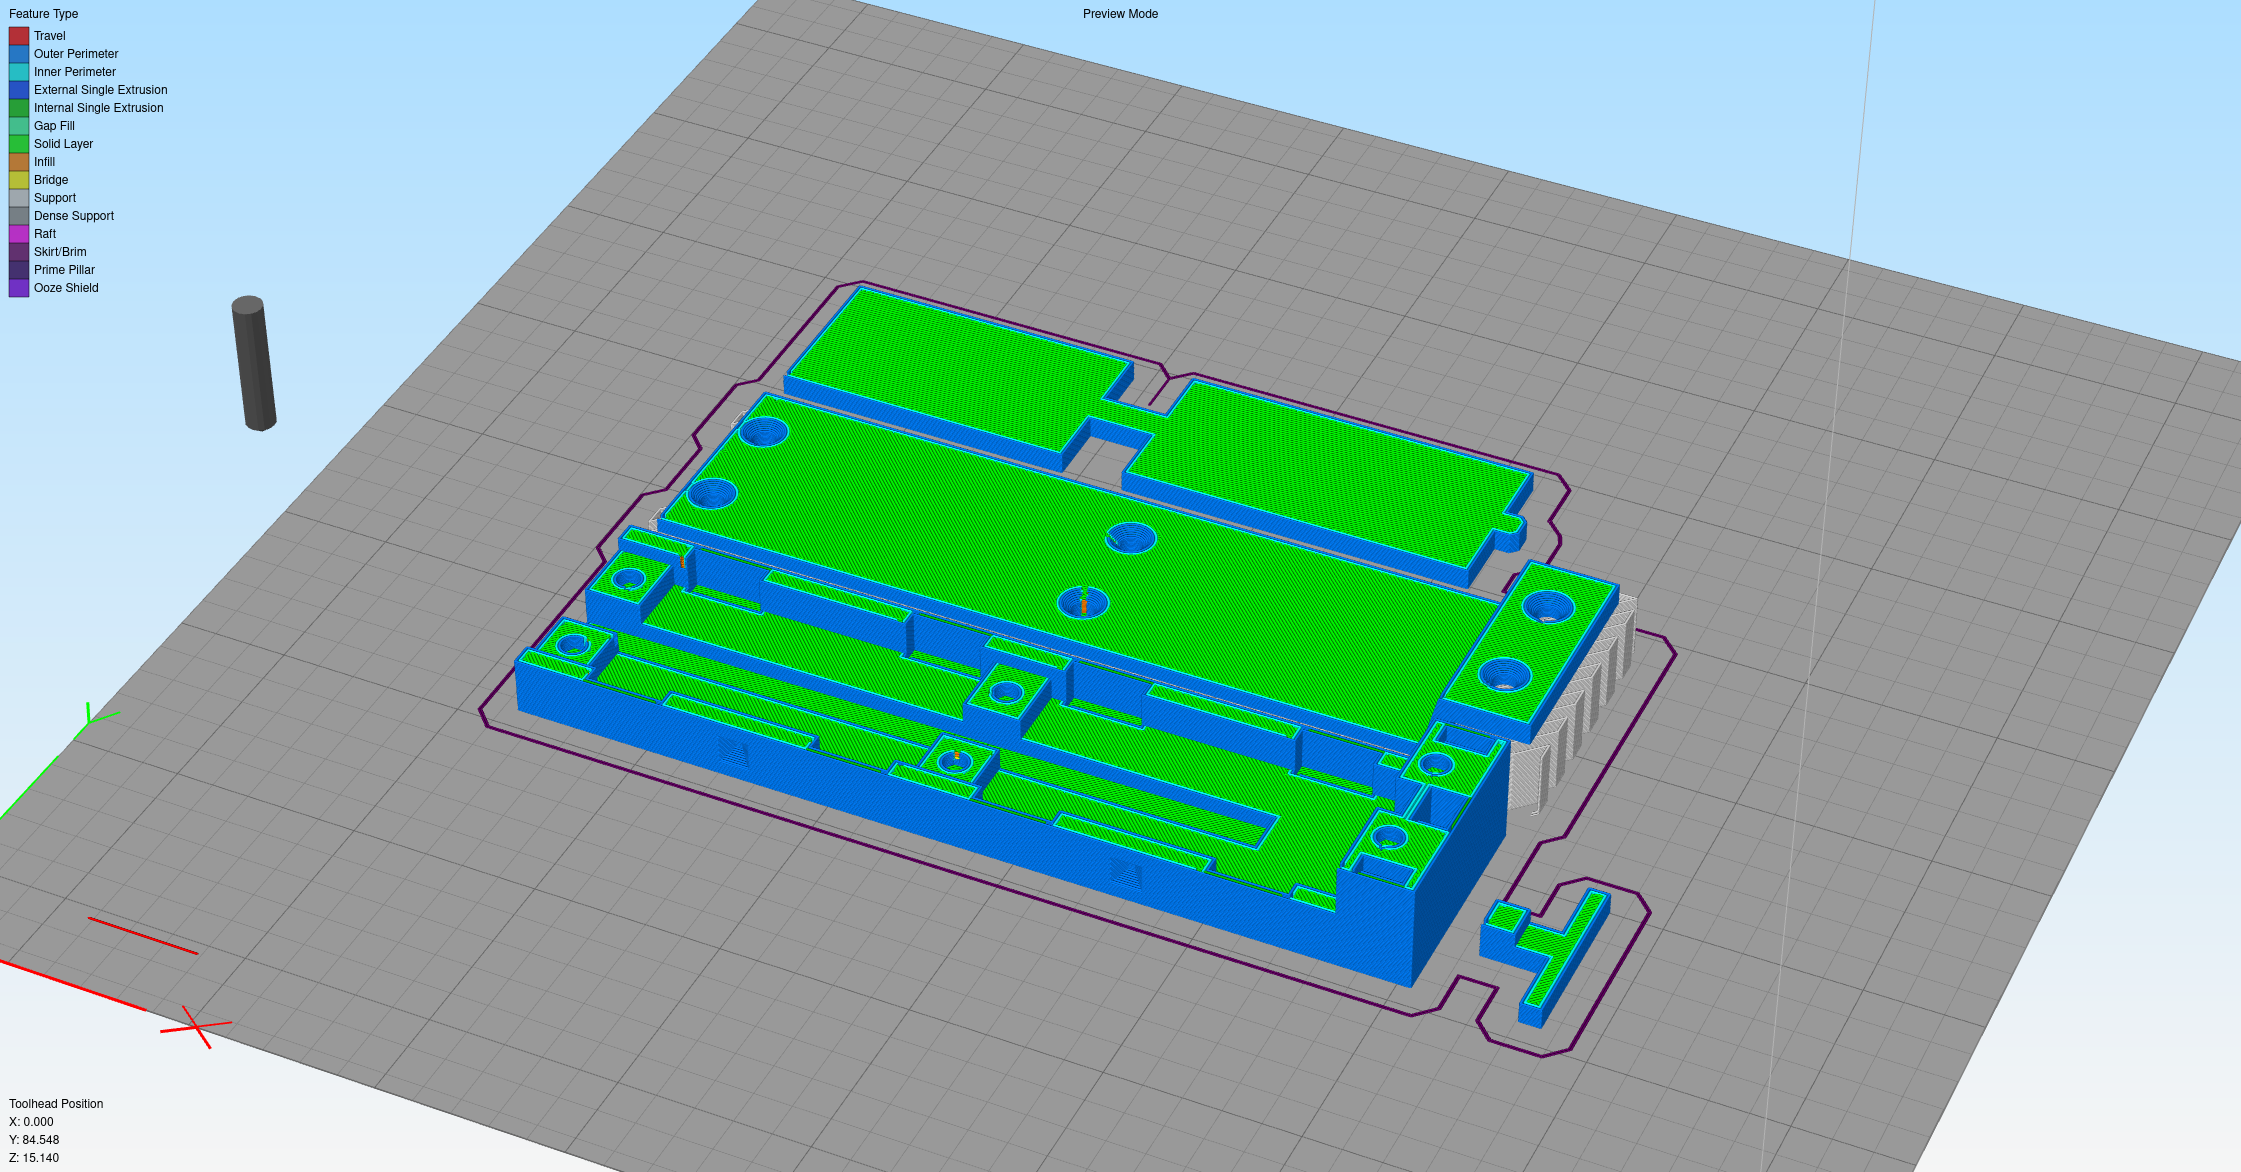
In order to make them easier to print and assemble, each wall is made up of 4 parts :

The part is assembled with six M2.5 countersunk Torx screws and nuts. In order to ensure a perfect flat surface on the bottom and a strong fixing (these small magnets are surprisingly strong), I embedded the nuts directly into blind holes into the main body by adding pauses at the correct heights during the print : with the default dimensions, this is 4.6mm for the four nuts on the left, and 13.6mm for the two on the right.
Once the print is done, the inner plate is attached to the main body with CA glue. This creates a perfect rail into which the magnets can slide, without requiring internal support. If you want to build this box yourself, make sure to clean up the parts beforehand and do not skimp on the glue : the magnets in the rail do not like being pushed together in this repulsive configuration, and they can easily rip the two parts apart if they are not securely attached.
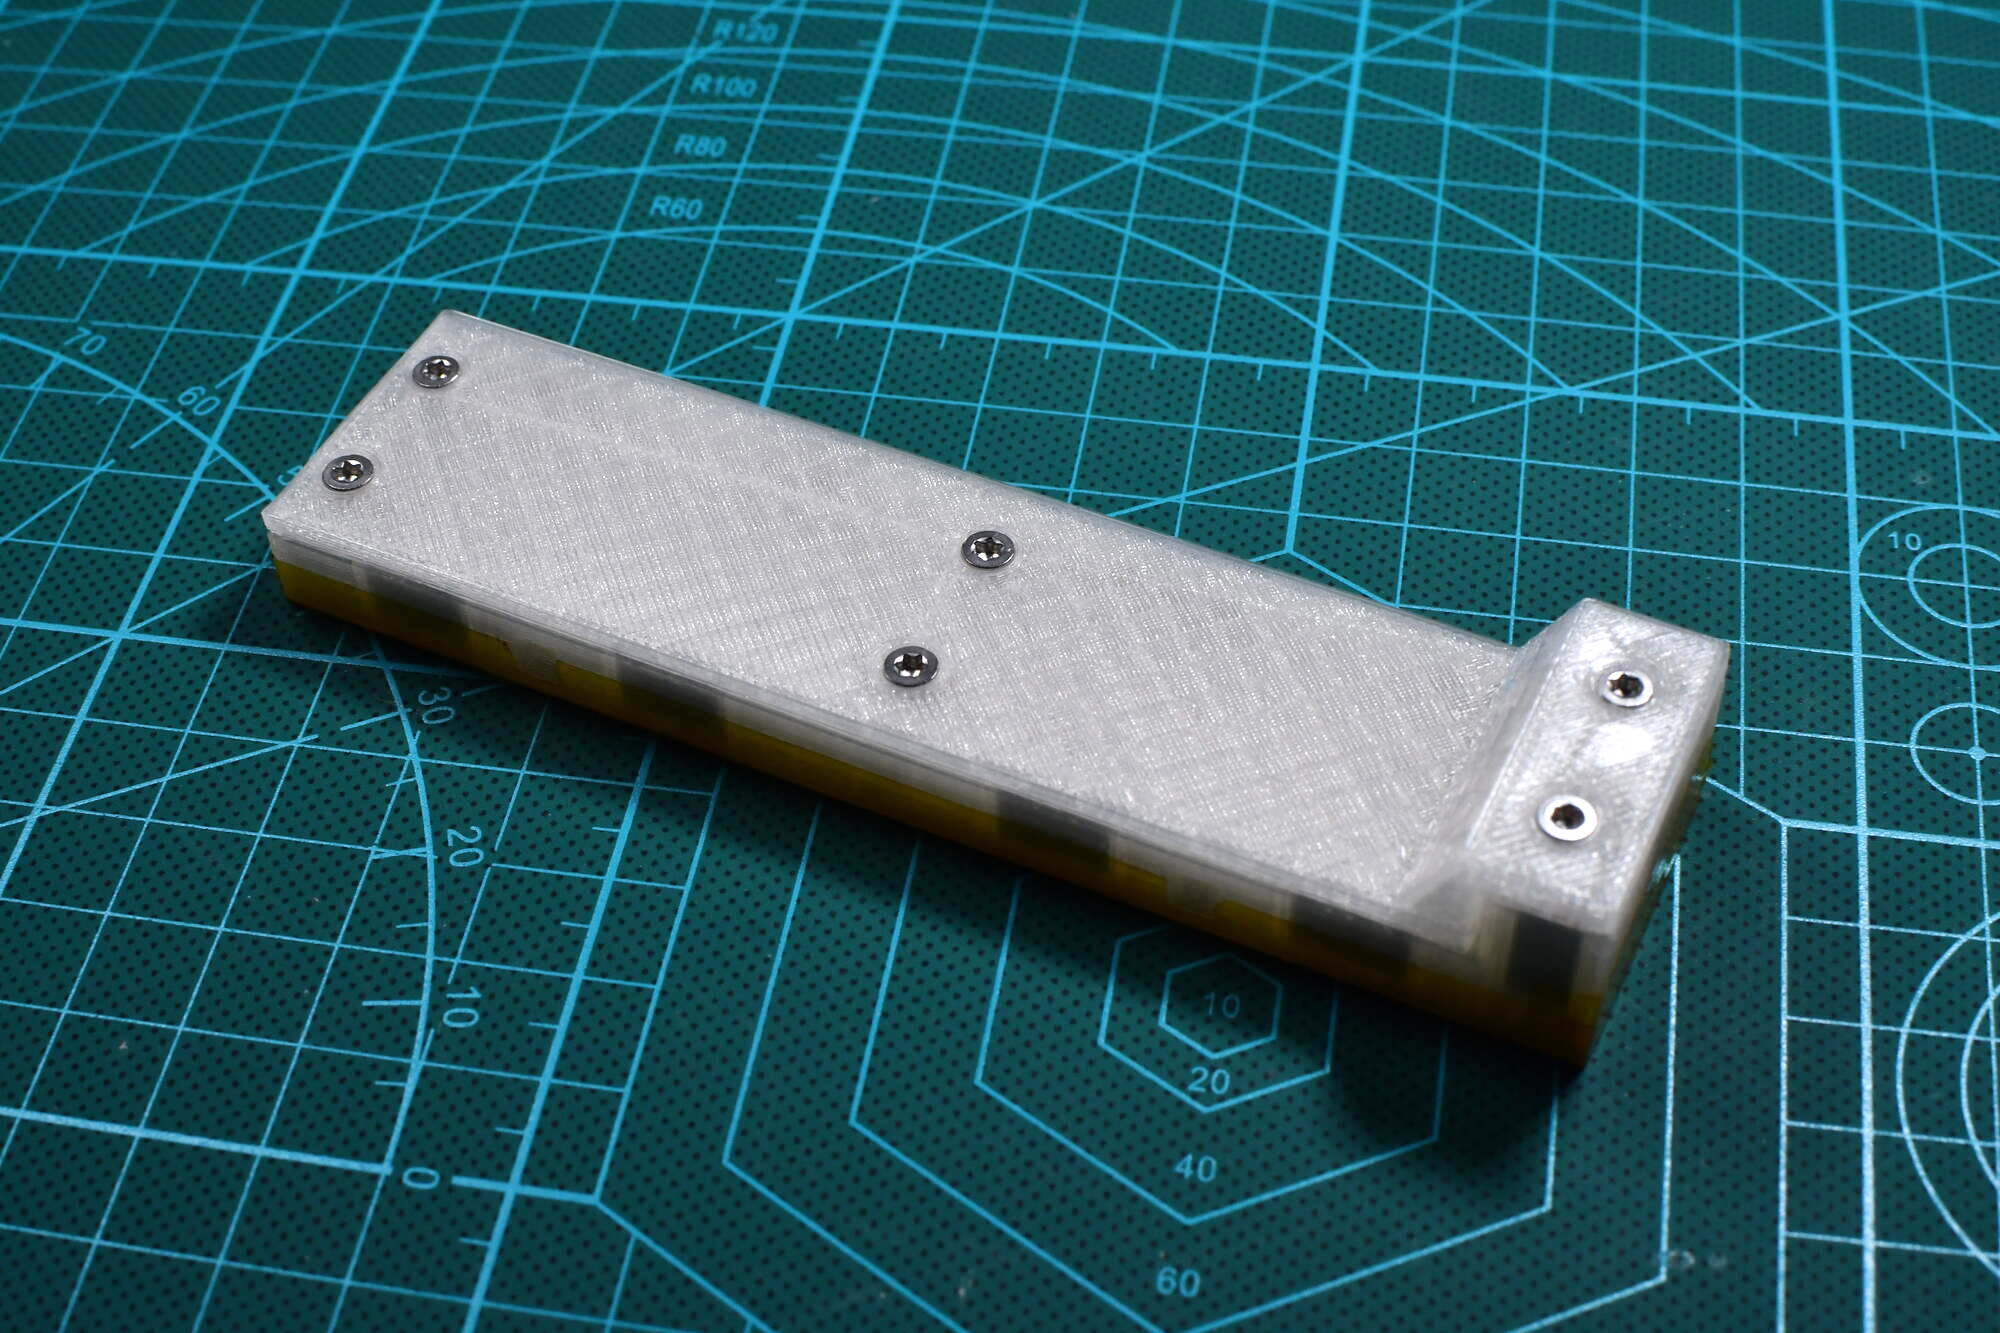
The magnets are then inserted in the part : they are press-fit on the sides, and they slide in the main rail. Small tip : always double-check the orientation when you insert a magnet by comparing it to a known reference (a previously finished wall), then triple-check by checking that the two walls snap together correctly once in place. As I said, in this configuration the magnets in the rail tend to push against each other, and they need to be firmly pushed in place before adding the locking tab. I made a simple 3D-printed push-rod to ease this process. The cover is then closed with the six screws to secure everything in place. Finally, I added a layer of Kapton on the inner surface of the wall to make it smoother, easier to clean, and prevent any possible curing inhibition of the silicone resin (I know that Kapton is an inert material in this regard).

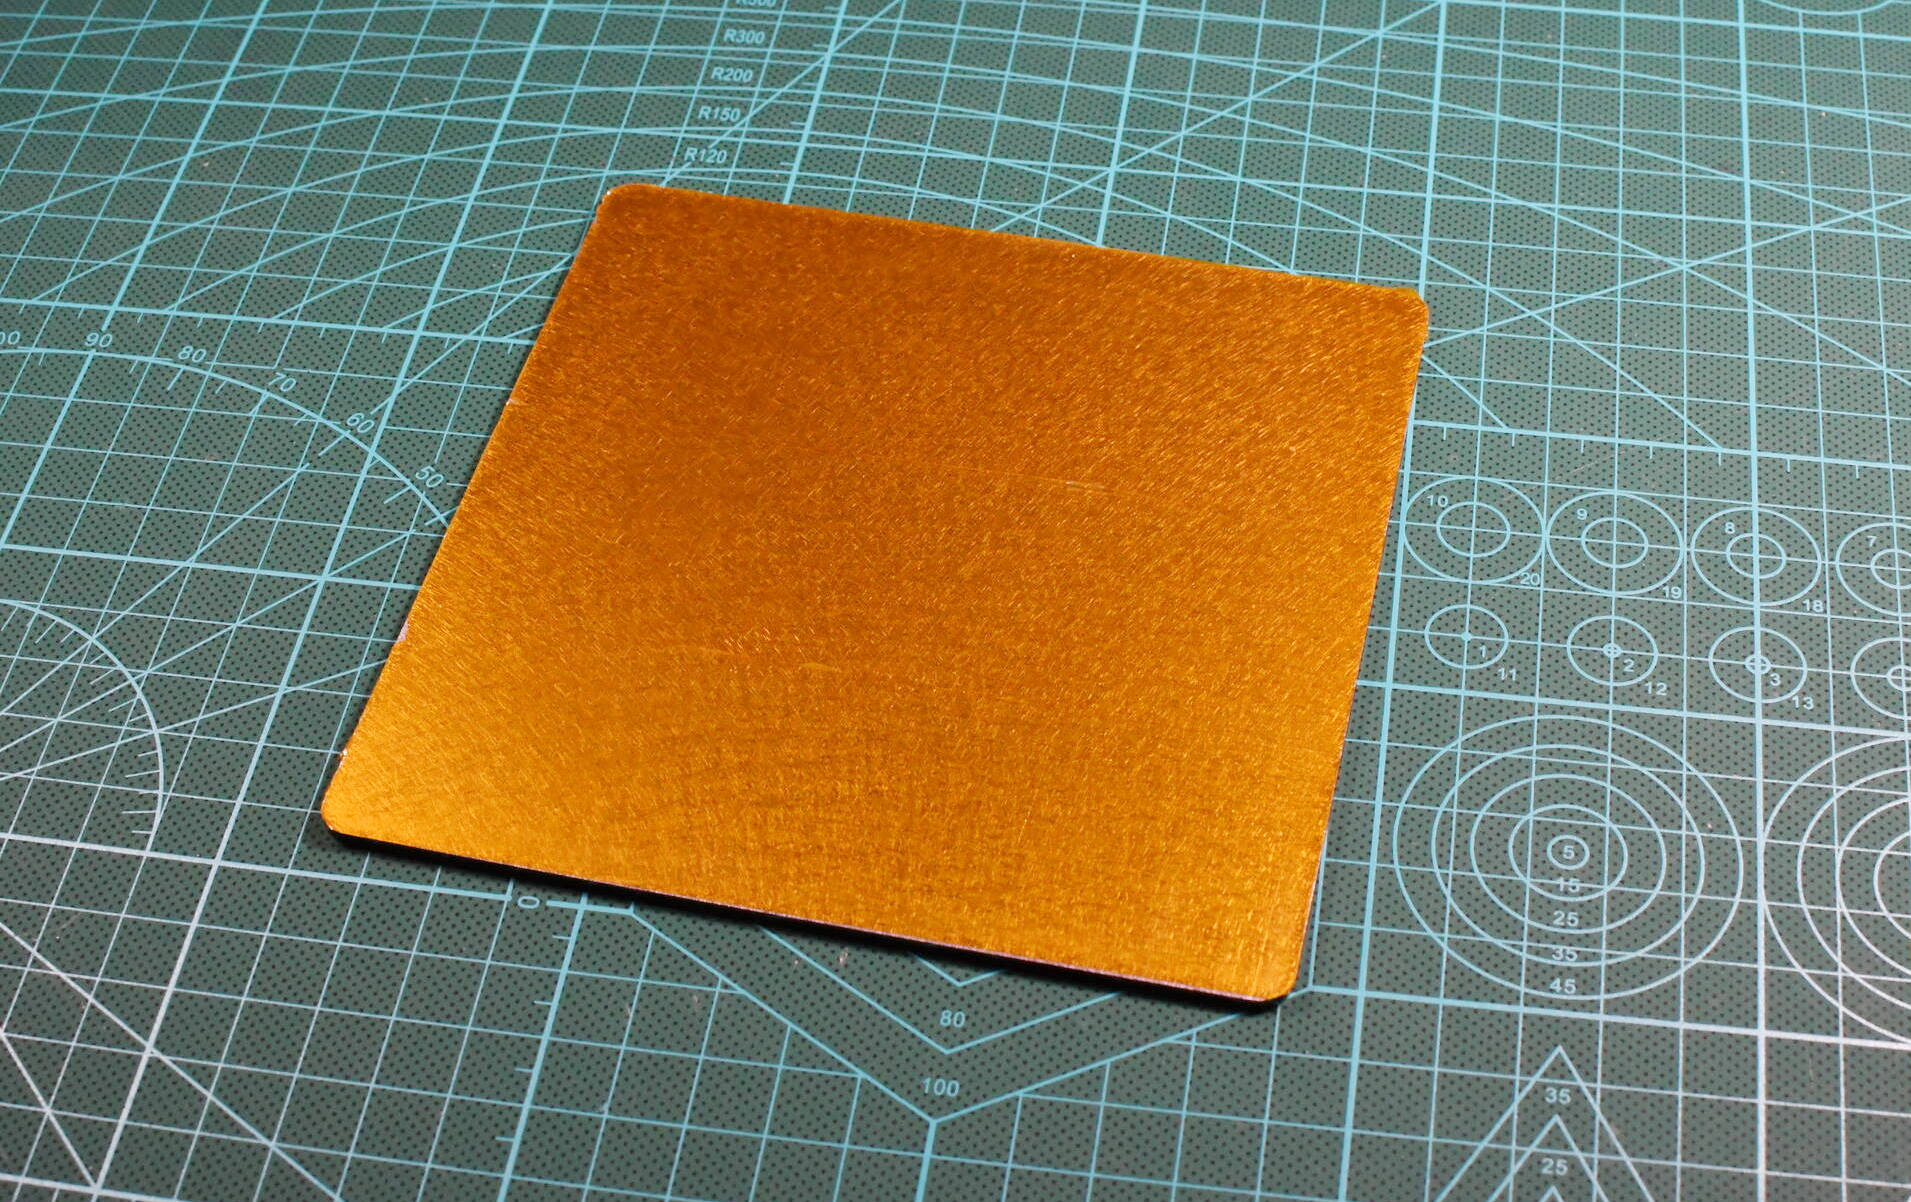
The baseplate is a simple 13cm x 13cm, laser-cut, 2mm steel plate ordered from John Steel, and covered with Kapton tape as well.
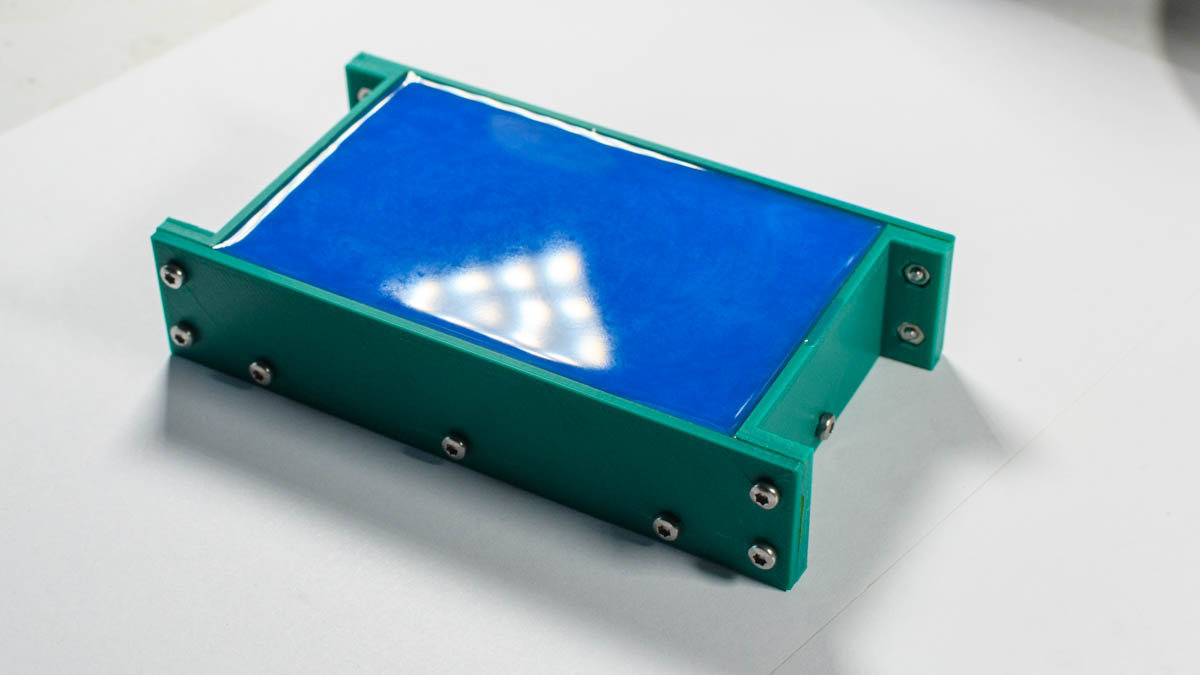
In the end, the box works great :


I made two sets of walls (8 walls in total) for a maximum volume of 100cm x 10cm x 6cm, which is more than enough for the kind of casting I do. With 21 magnets in each wall, there is a total of 168 magnets in there.
If you are interested in building one yourself, here is how much it cost me :
- 250g of PolyLite Natural PLA : ~5€
- 168 magnets : ~50€
- laser-cut baseplate : 25€
So, about 80€ in total. The files (FreeCAD source files, STEPs and STLs) are available on GitHub :
https://github.com/Foalyy/casting_mag_box
When printing, do not forget to add the pauses for the nuts in your slicer or your GCode !
A note about the FreeCAD source files : as I said earlier, the model relies on an embedded spreadsheet to generate the geometry, therefore you theoretically should be able to adapt it to a different size of magnets and different external dimensions. However, FreeCAD is sometimes a bit brittle with this (and my model probably does not perfectly follow best practices in this regard), so be aware that things might break if you make too radical changes.
Let me know in the comments below if you build one yourself !